Target groups are the most advanced group type and are popular for use in automatic enrolment workflows. This is because rules with conditions are created to determine which users will be included and excluded. These rules process daily to ensure the group assignment is frequently updated. The rules can be created with conditions that consider:
-
Personal attribute values
-
Group assignment
-
Training history (Courses, Course templates and Learning paths)
-
Job profiles assigned
-
Skills achieved
-
Cluster (Classification object completion)
A rule can contain a single condition, or multiple conditions that form And condition logic. Multiple rules can also be created to form Or logic where only one rule needs to be satisfied for assignment. This Deep Dive Guide provides insights on how to create and test Target groups.
Creating a Target Group
To create a Target group, go to the Organisational structure and groups function. Click on the Create button and select the Target group option. Decide where the group should be inserted. However, this can also be changed retrospectively after creating the group via drag & drop. Once decided, a new window will open where various tabs are displayed.
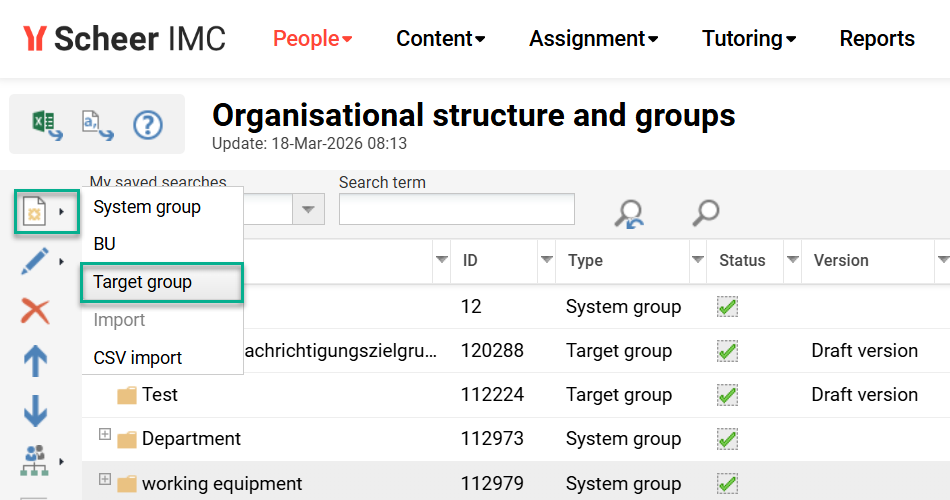
Unlike System groups and BU groups, Target groups can not be created in hierarchical structures. Placement options are Before or After the selected element (the highlighted group).
Description Tab
In the Description tab you can set the Status field to determine if the target group will be Active or Inactive. You can also fill in several other fields in this tab, e.g. Provider, Clients etc. You can use the 'i' Information button, which is above the individual fields, to display a description of the respective field. The two fields that must be populated are Comment on changes and Name fields. These descriptions should be clear and concise so that the group can be found easily.

Rules Tab
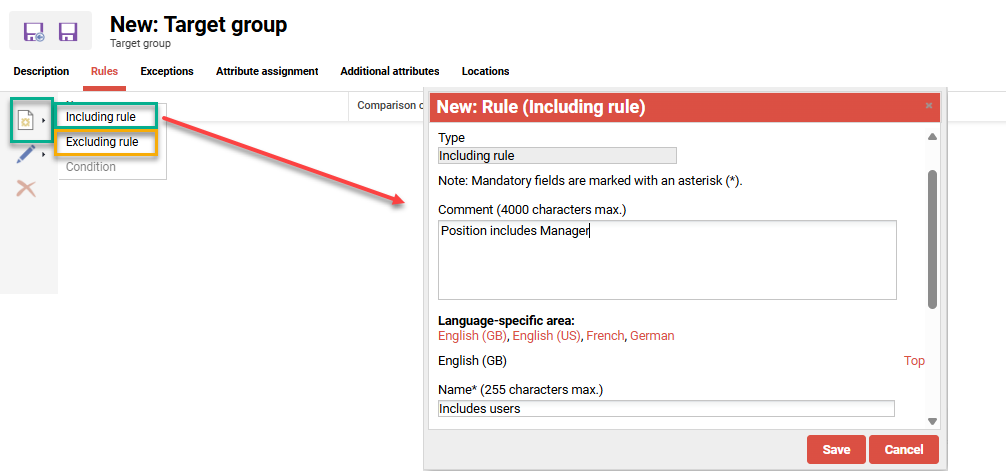
The Rules tab is where you define the rules that determine which users are to be assigned to the group. There are two different rule options:
-
Including rule: Users are added to the group based on certain attributes or conditions.
-
Excluding rule: Users are excluded from the group based on certain attributes or conditions.
Each created rule must be named and a comment can also be added to describe the rule.
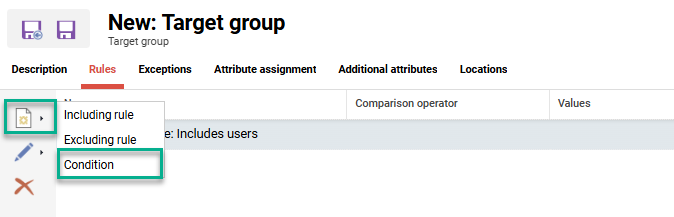
Once you have initially saved the rule, the Condition option becomes available. Highlight the rule, click the Create icon and select the Condition option to commence building the rule.
A new Selection window opens with eight tabs representing the condition options to identify users. These tabs include:
-
Cluster: User has completed a course based on selected Classification.
-
Learning paths: User has selected status on selected Learning path within timeframe.
-
Course templates: User has selected status on a course derived from the selected template within a timeframe.
-
Courses: User has selected status on the course within a timeframe.
-
Skills: User has achieved the selected Skill and level.
-
Job profiles: User has the selected Job profile assigned in a ‘Confirmed’ state.
-
Groups: User is assigned to the selected group.
-
Attributes: User holds the matching comparison operator value for selected attributes.
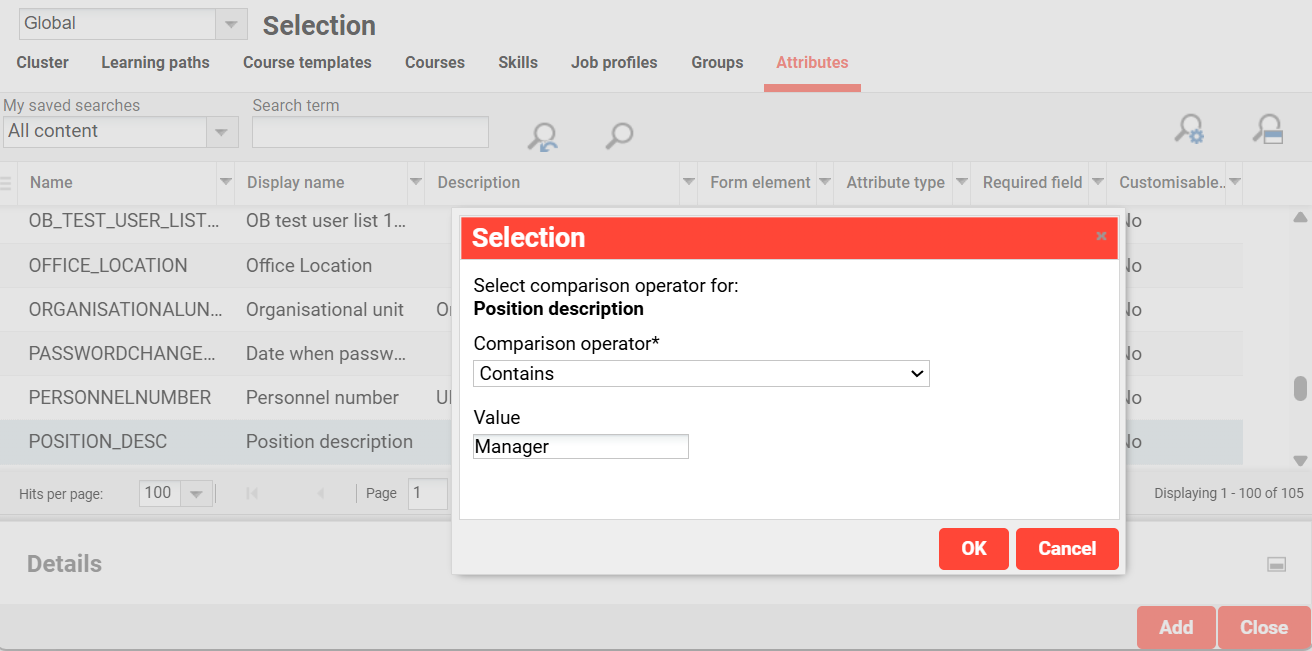
The following example shows where a text-field Attribute has been selected as a condition. Once added, a new popup displays the available comparison operators.
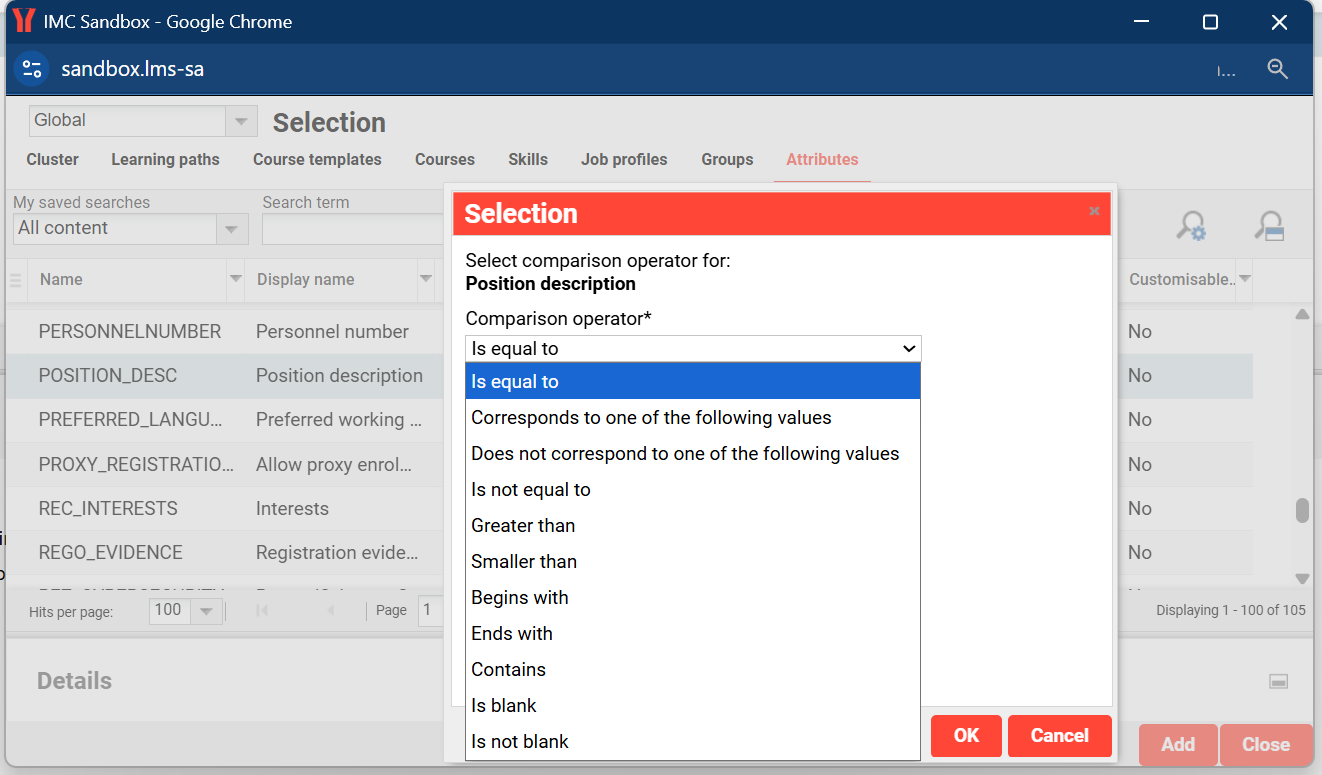
The available comparison operators differ for each Personal attribute type.
The example, the custom attribute POSITION_DESC was selected with the ‘Contains' comparison operator. Enter the Value that should be queried; e.g. the value 'Manager' will return all users with the word 'Manager’ in the Position description attribute.
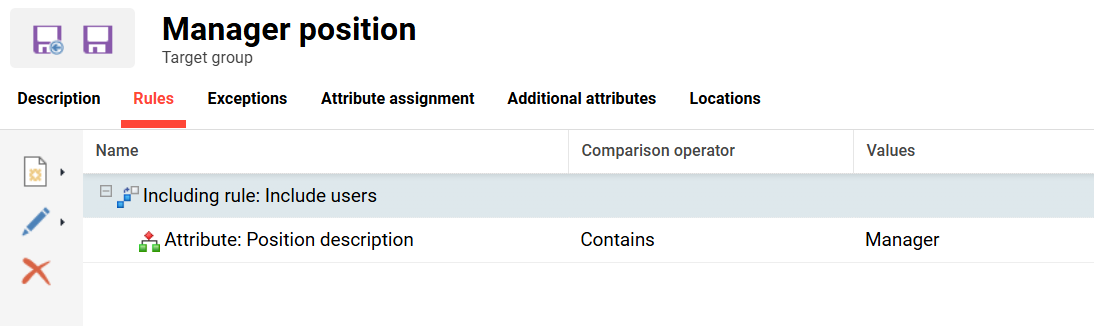
As soon as you click OK, you will see the defined rule again, including the condition. In the current example, a rule has been defined that causes all users of the system whose Position description contains ‘Manager’ to be added to the group.
Each rule can contain multiple conditions to form ‘AND’ logic. For example, another condition could be added to the above rule: Position description contain ‘Manager’ and Country equals ‘Germany’. This means that users must fulfill all conditions to be meet the rule. Further including rules with conditions can also be created to form ‘OR’ logic.
Users that are covered by including rule and excluding rule are always excluded from the Target group.
Example:
A target group could include “All managers based in Germany” and exclude “All users that have completed a ‘Leadership’ course template in the past 24 months”.
Exceptions Tab
You also have the option of defining exceptions to the rules in the Exceptions tab. This allows you to manually determine individual users that fall outside the rules to include or exclude.
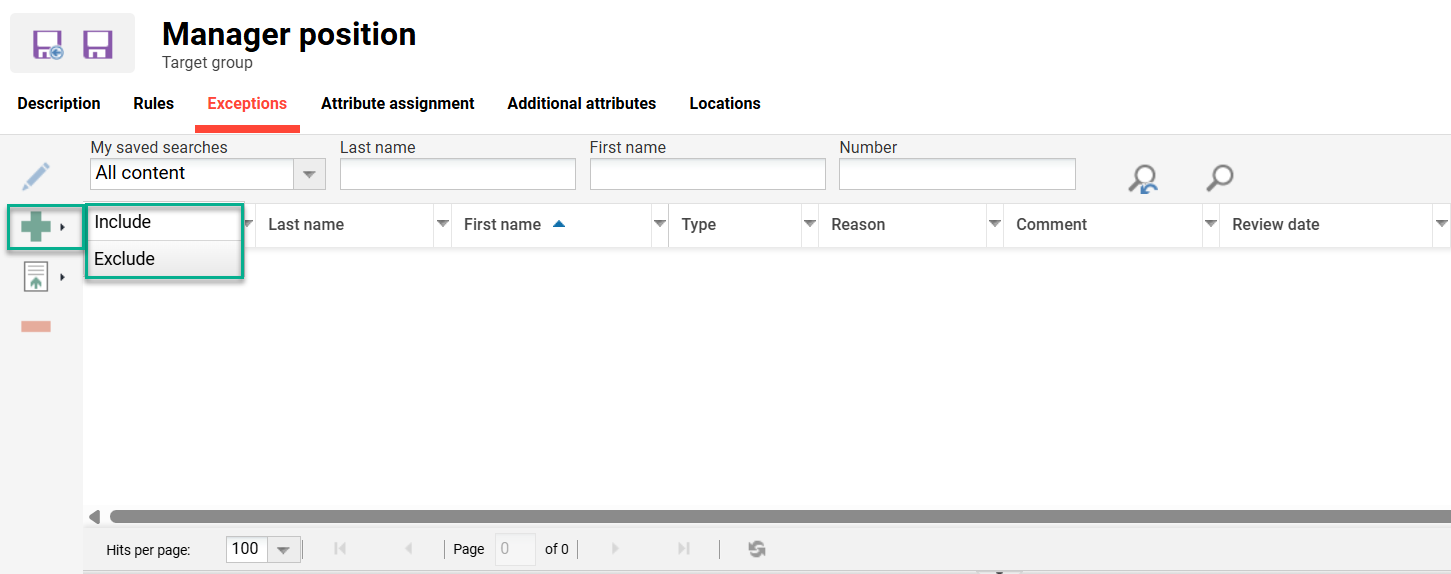
If you select Include , for example, a new Selection window opens. In this window, you can select the user you want to include or add to the group (or exclude from the group if you have previously selected Exclude). When a user is selected another window will open where you need to select a Reason for the exception and add a Comment. In addition, there is also the option to set a Review Date. This allows you to specify the date on which this exception should be checked again.
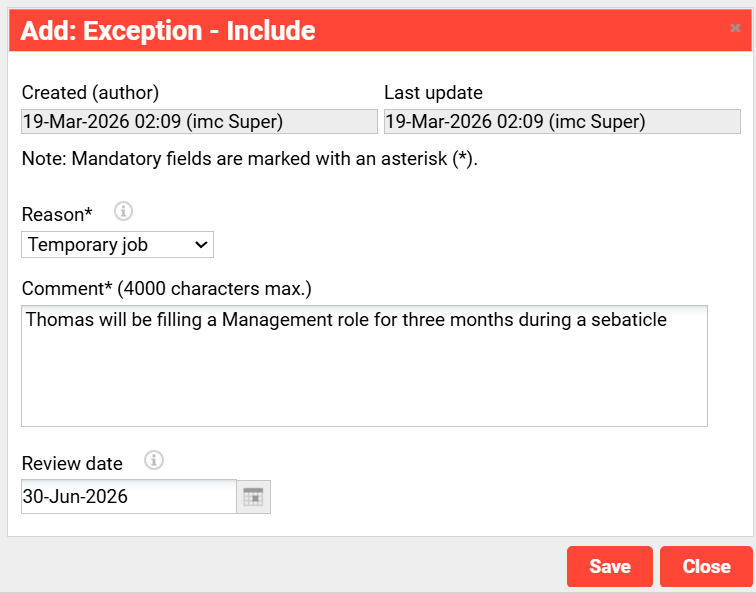
When you click the Save button, the added users will be displayed in the Exceptions tab below. Once done, close the pop-up window.
Ensure you click the Save button once you have finished describing the group, defined the rules, and exceptions added; otherwise changes will not be saved.
Checking the Rules
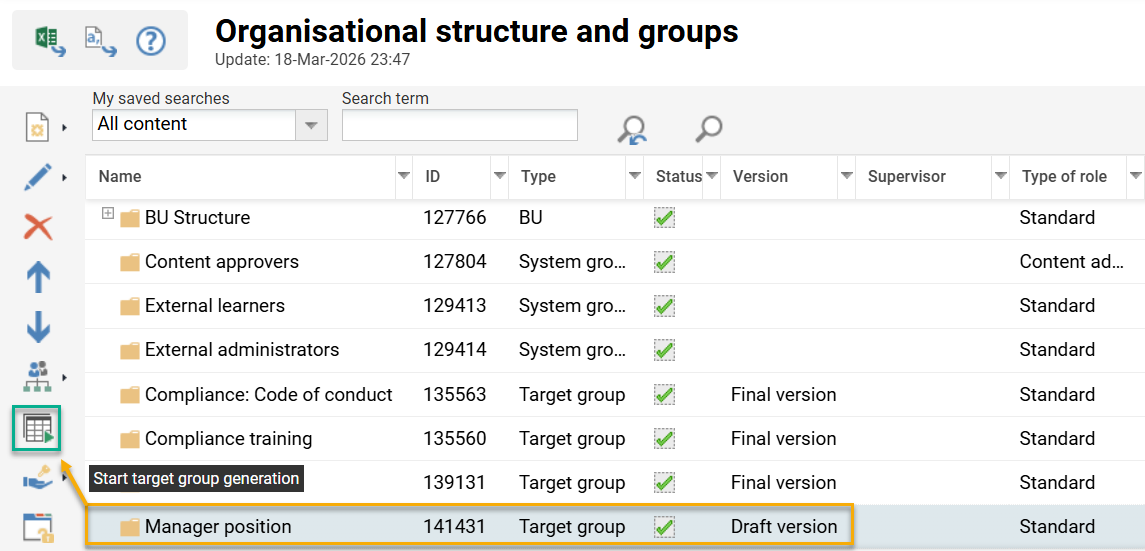
After the Target group is saved, you will need to check the rules to ensure users have been assigned as expected. You can do this using the Start target group generation icon. This will manually process the rules of the highlighted target group.
Once processing is complete, you can click the User assignment icon and select Participant list to view assigned users.
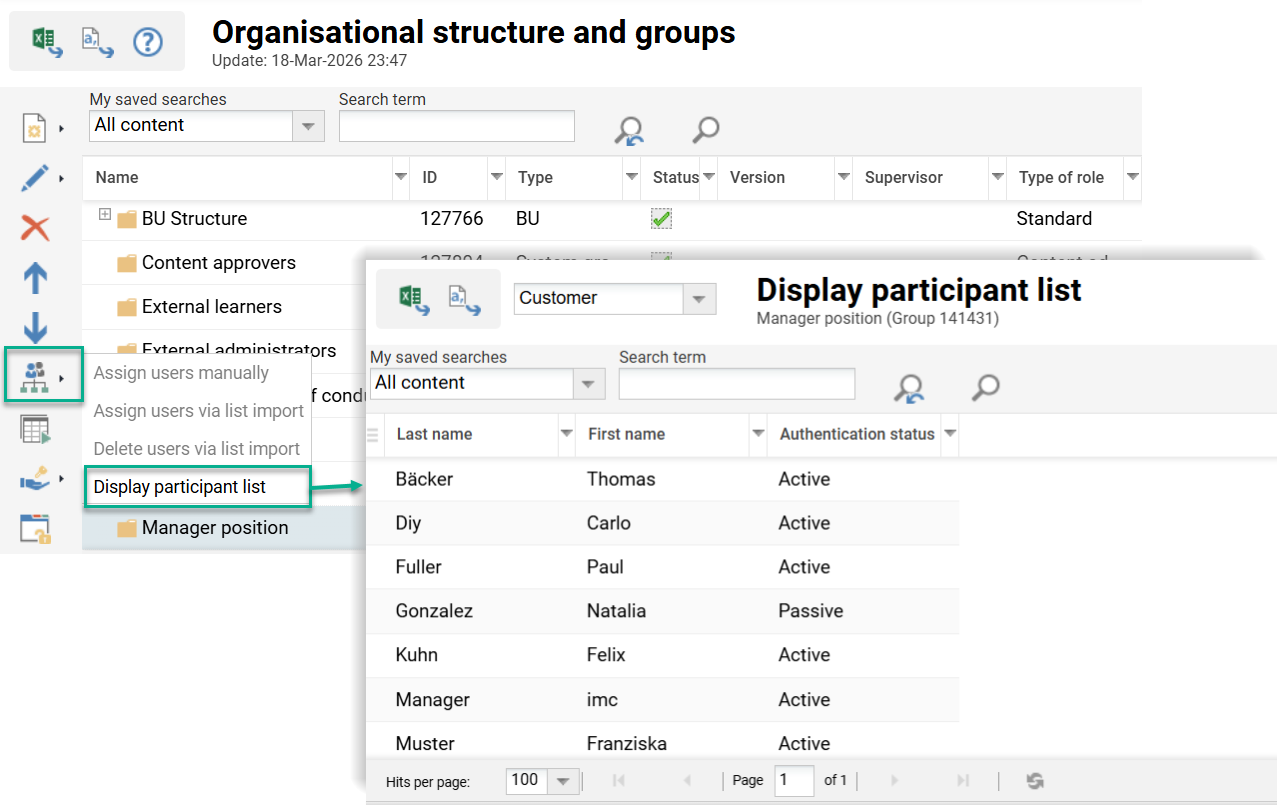
If the users assigned in the Participant list look correct, the group can be finalised as described in the next step. If the Participant list users are not as expected, edit the group and review changes.
Target group rules are processed daily via the TargetGroupPersonAssignment cron job stored in the Scheduled jobs function.
Processor Name: de.imc.clix.comp.groupmanagement.targetgroup.job.RuleSetProcessorJob
Finalising the Group
When you first create a Target group it be saved as a Draft version. In order to use the target group throughout the system (i.e. in course assignments), you will need to convert to a Final version. You can do this by highlighting the group, clicking the Edit icon and selecting the Final version option. Your Target group will now be ready and visible for live use in all functions.