Deep dive: Exploring configuration options of the Test Player
Test Player Overview
The Test Player function allows you to define many settings that impact how participants experience a Test. There are approximately 50 settings for the Test Player that adjust the Test delivery and experience. Key areas of control include information display, assignment, access, navigation, feedback, results, process time limits, and certificate access. This granular level of control is great for delivering flexibility to achieve a variety of Test scenarios.

Test Player Configuration
Test Player settings can either be configured directly within the Tests and Test templates function, or created separately as a reusable template within the Test player function. Each setting is described in the Test Player Settings section below.
Test Player Function
The Test player function is where you can create reusable templates. These templates can be selected when creating Test templates or Tests. Any number of templates can be created and named according to their configured settings. The use of templates delivers efficiency and consistency when creating similar Tests. Common use cases for Test player templates can be for:
-
Timed tests
-
Tests requiring access codes
-
Tests that do not show results
-
Certification tests with restricted navigation and no feedback
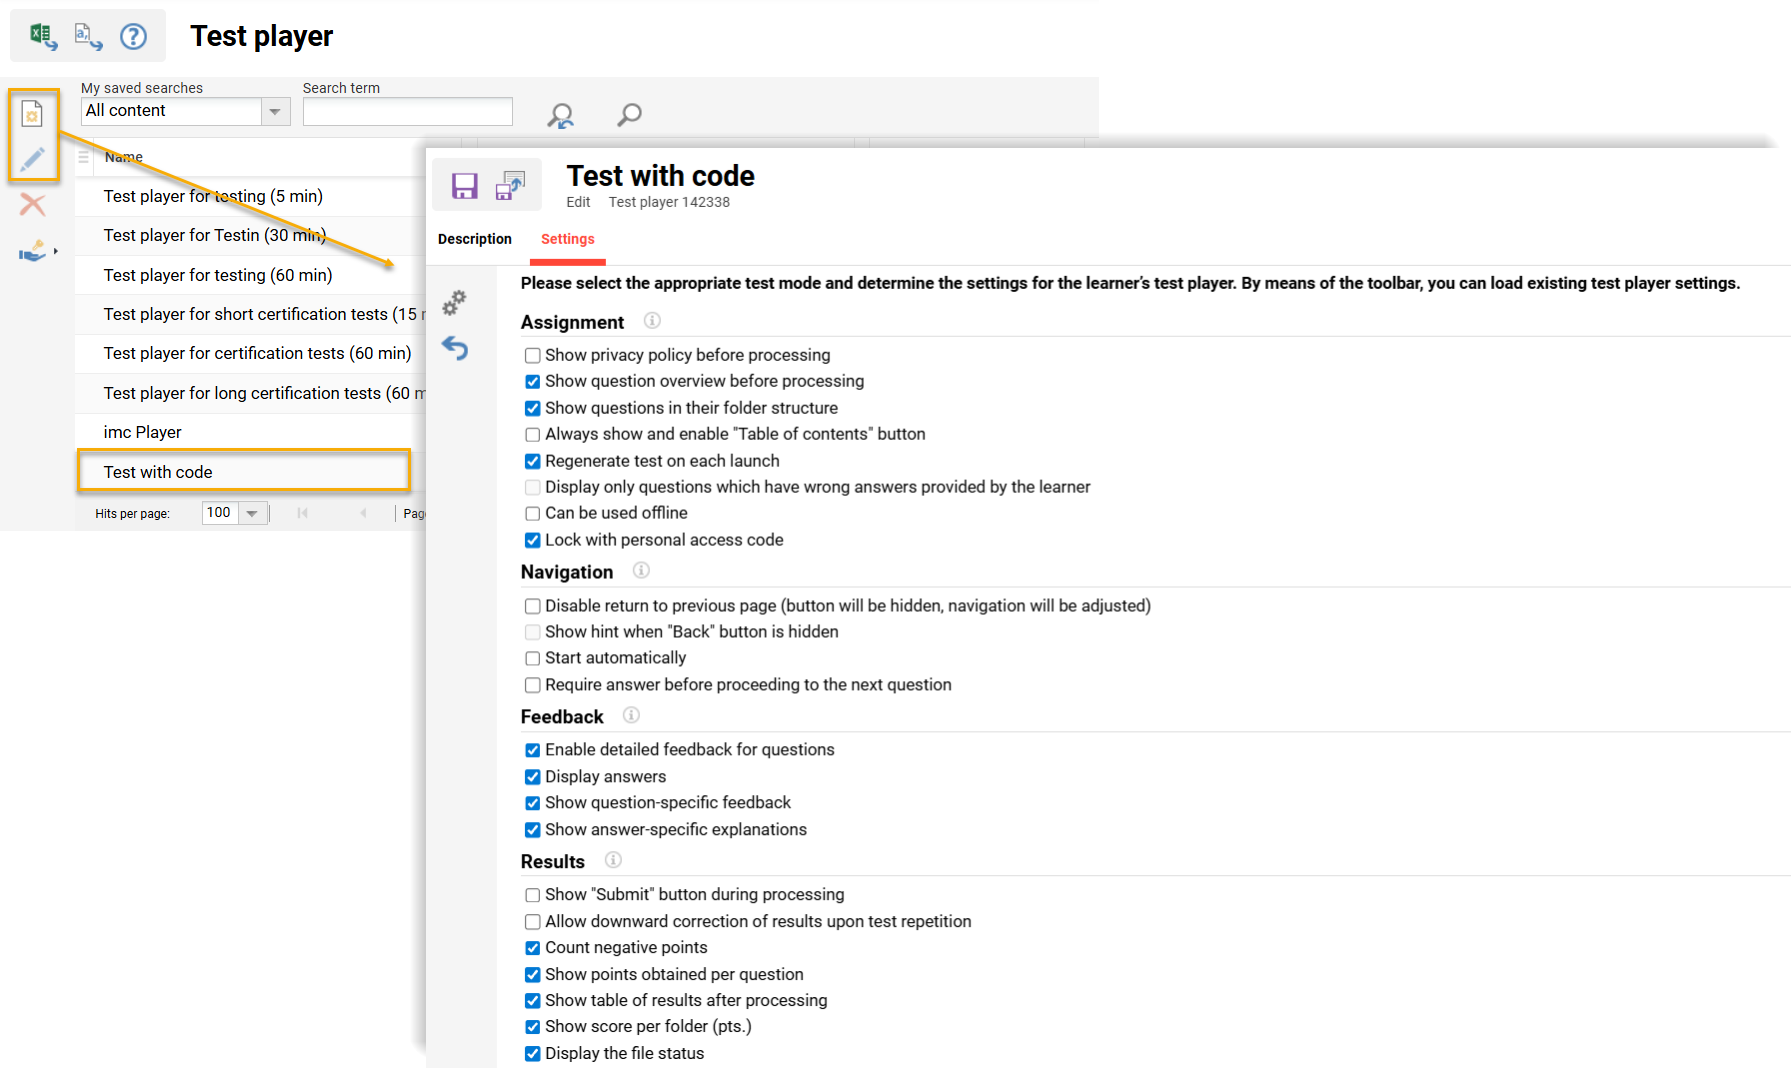
Test Player Tab in a Test
Within a Test or Test template, the Test player tab is where you can directly configure settings or select an existing template. Here, there are the same settings as within the Test Player function to manually configure per test. Assigning a pre-defined template is possible via the Settings icon and clicking the Selected test player option. Selecting an existing template will adjust the values for all settings to match the template. If changing any of the pre-defined settings, the Test player field will be displayed as “Customised test mode: The original settings have been changed”.

Test Player Settings
The Test Player contains close to fifty settings across eight sections. Each of these sections, along with their settings, are explained below with images and relationships to other settings.
Assignment Section
This section contains settings that affect participant access to the test.
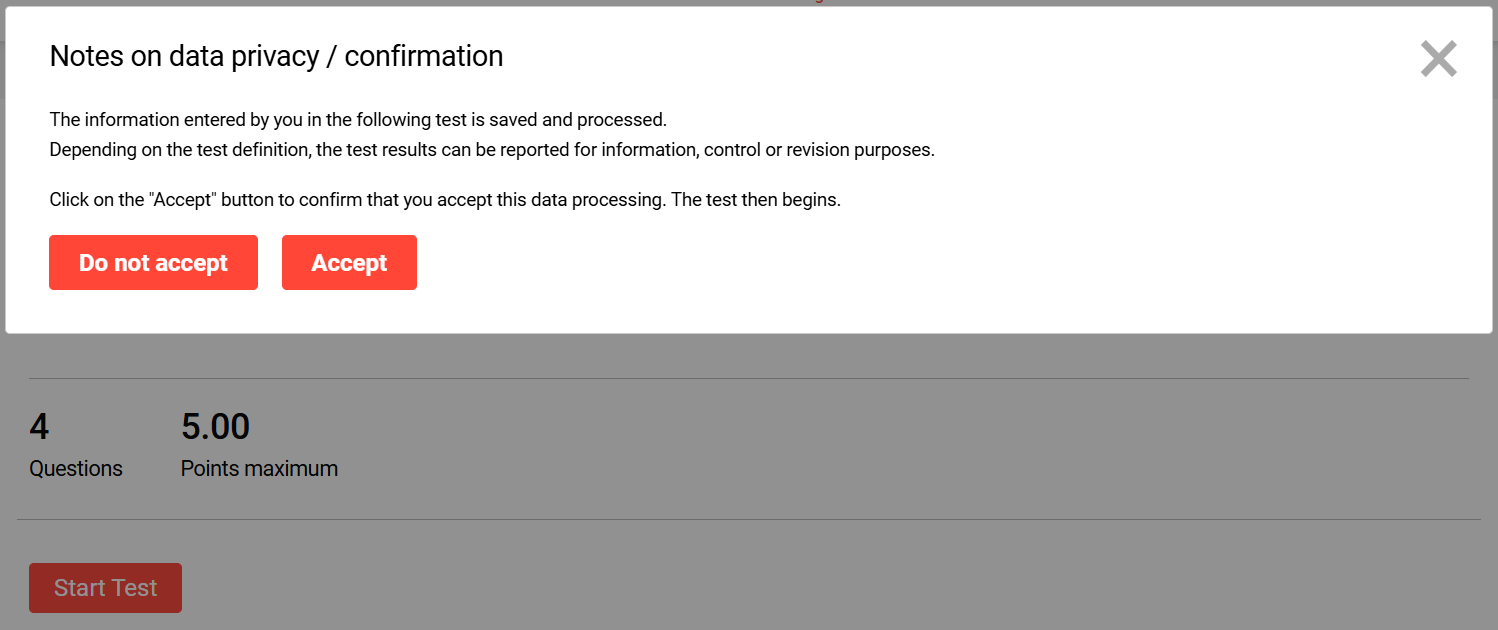
Show privacy policy before processing
This setting displays a privacy policy message to the participant when they open the test. The message contains a Do not accept button and an Accept button. The Test can only be started once the Accept button is clicked. The message text is configurable in the System texts function with bundle strQtiPrivacyStatementText (ID 17346).
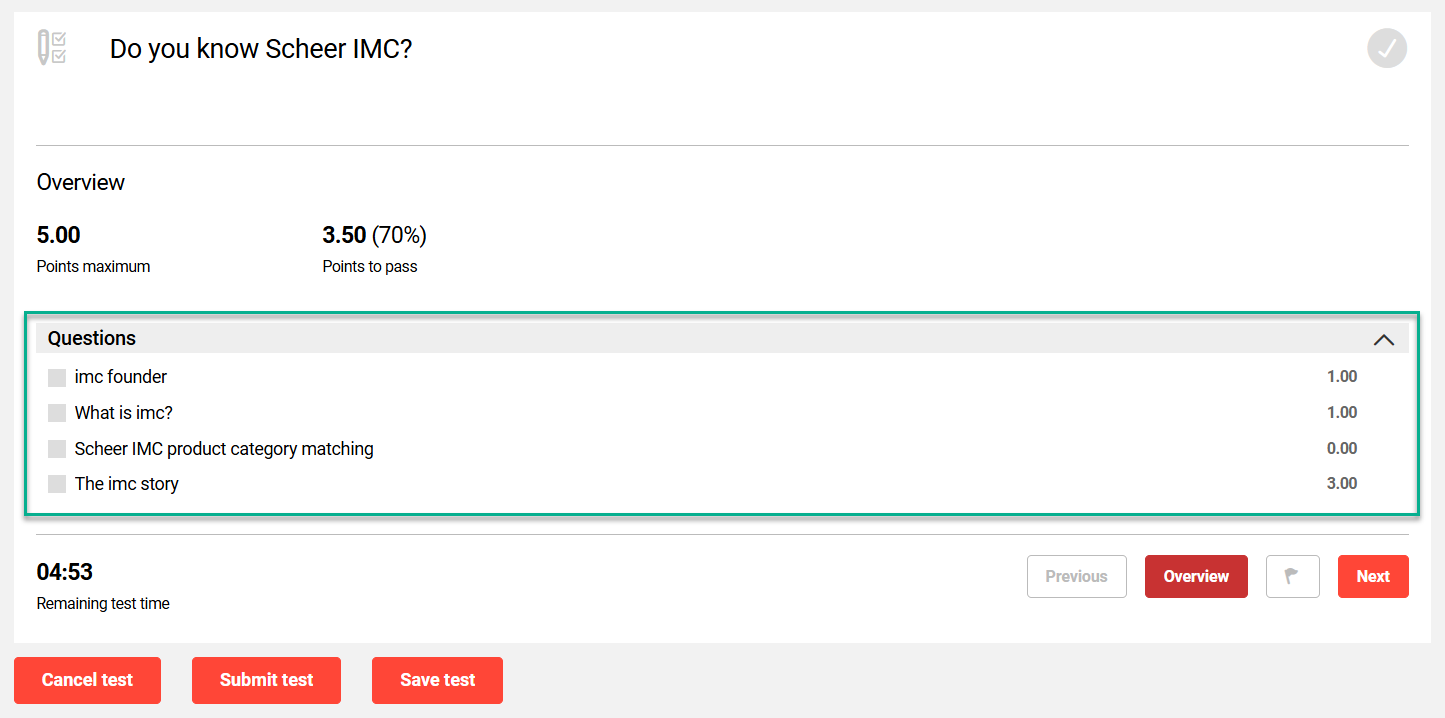
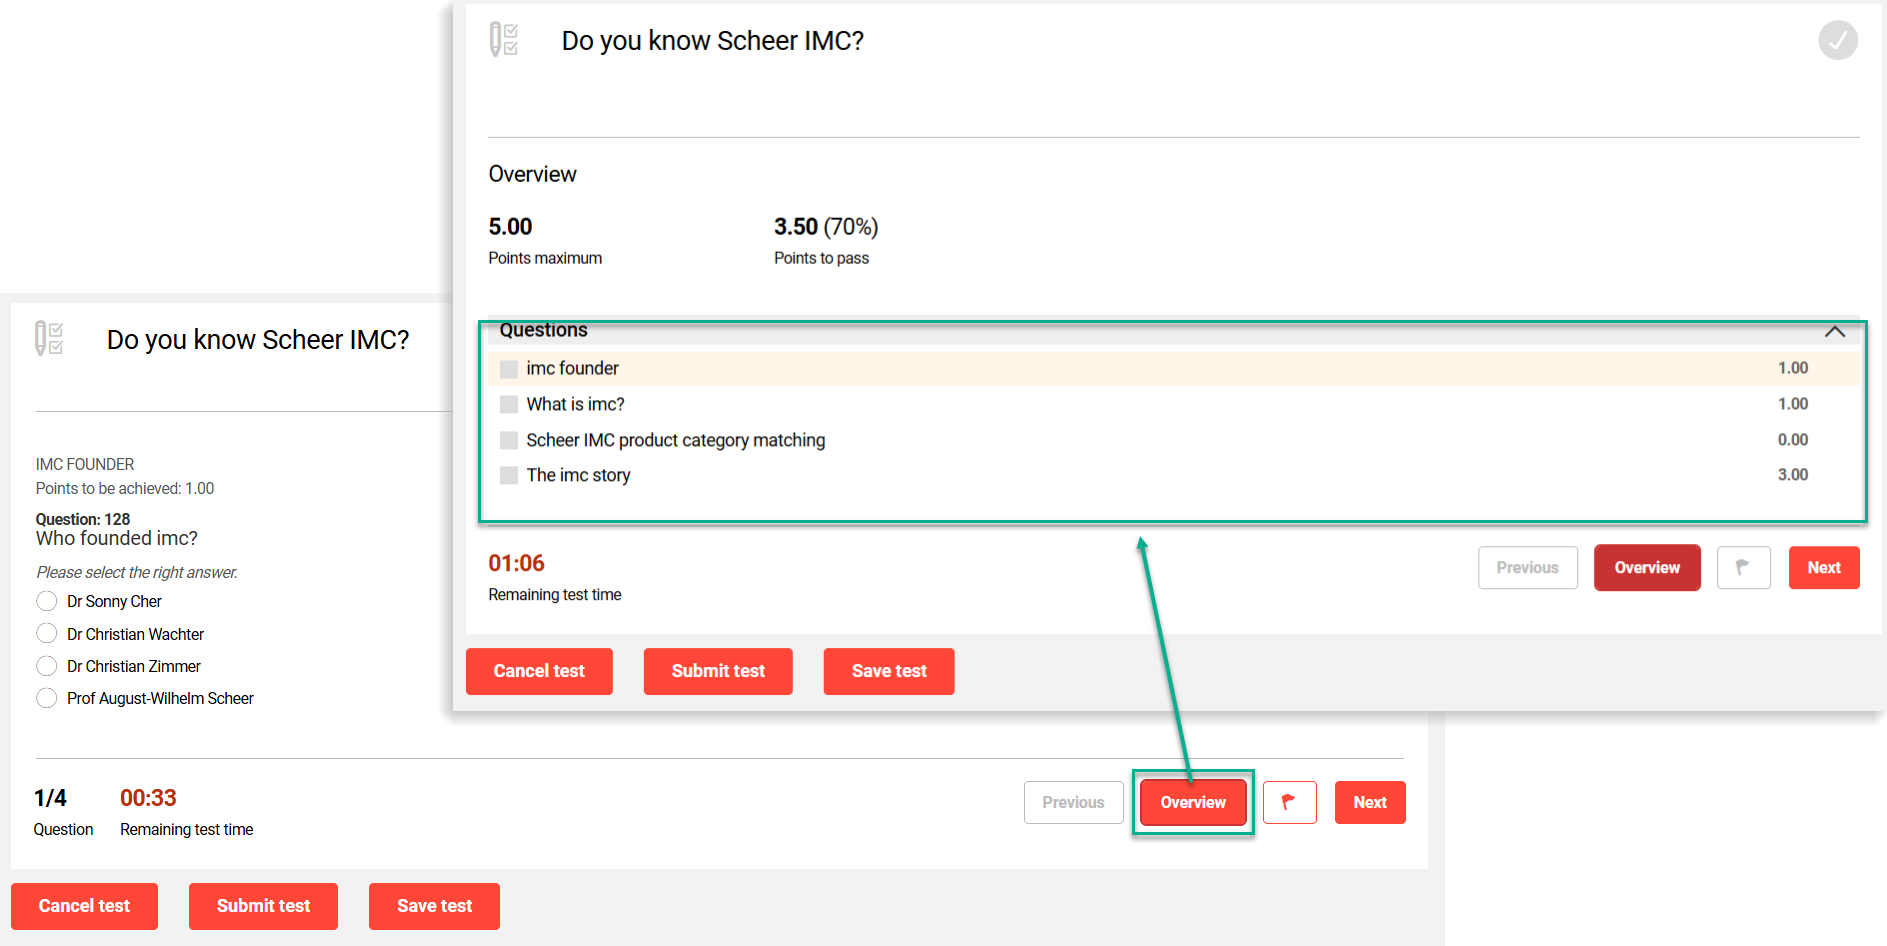
Show question overview before processing
This setting can be used to display an overview of all questions before the first question appears. The questions can all be displayed at the same level or within folder structures if the Show questions in their folder structure checkbox is also ticked.
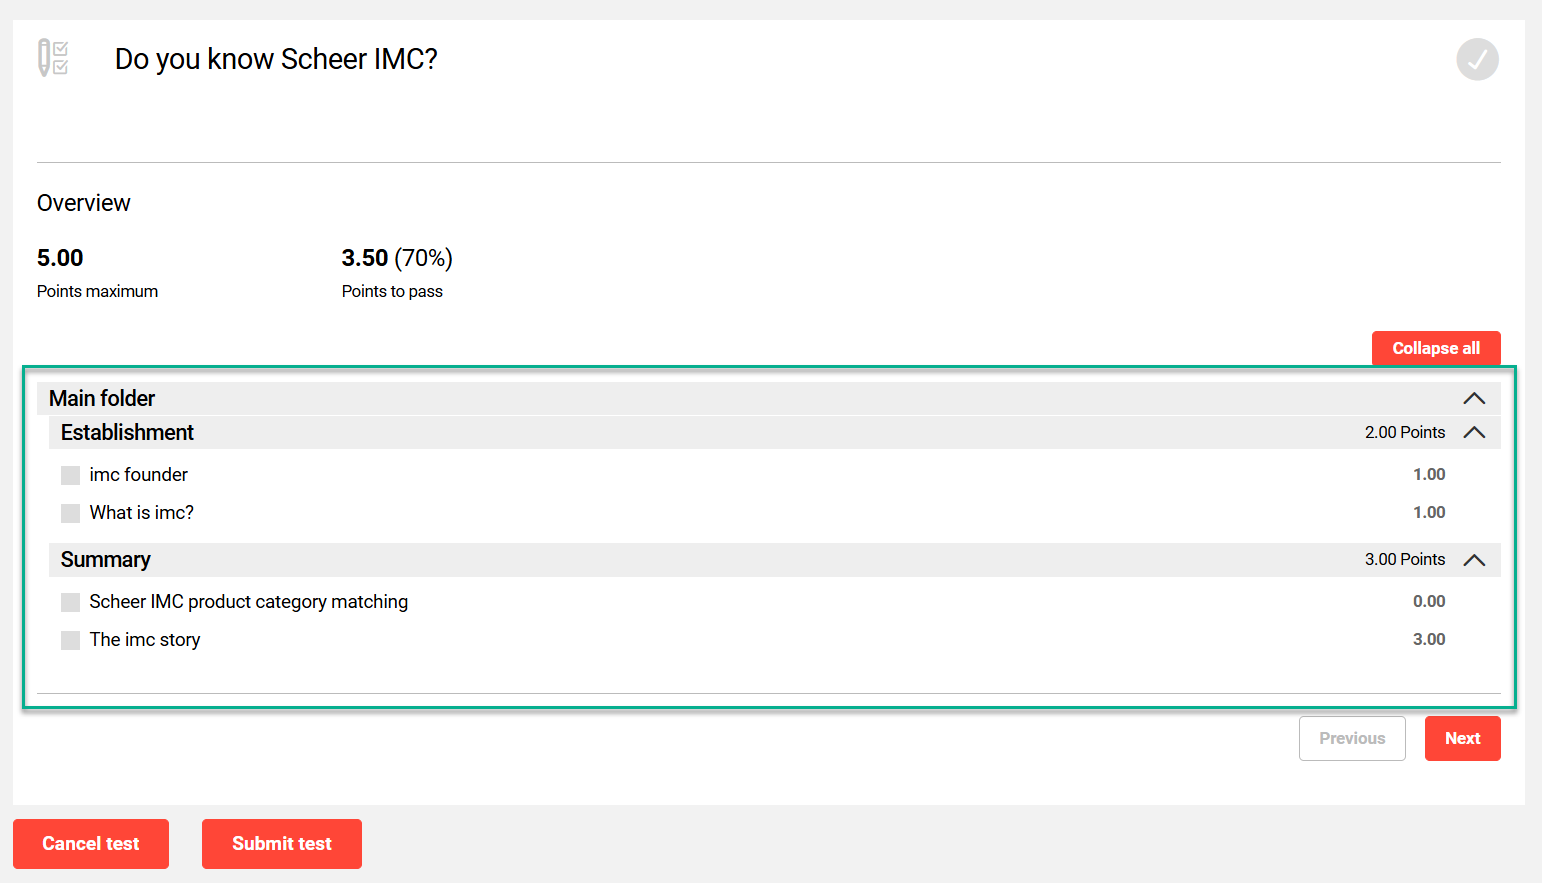
Show questions in their folder structure
Select this setting to display an overview of all questions in their folder structure when participants open the test. This does require the Show question overview before processing checkbox to also be ticked.
Always show and enable “Table of contents” button
When ticked, this setting displays an Overview button on each question. When clicked, the participant returns to the question overview screen. Clicking the Overview button again will return to the previous question.
Regenerate test on each launch
This setting relates to a Test Series test type where questions can be randomised from a pool of questions. When ticked, this setting will randomly assign different questions for the same participant each time the test is started. This prevents the participant exiting or failing the test and receiving the same questions on subsequent attempts. For a regular Test this setting will have no impact.
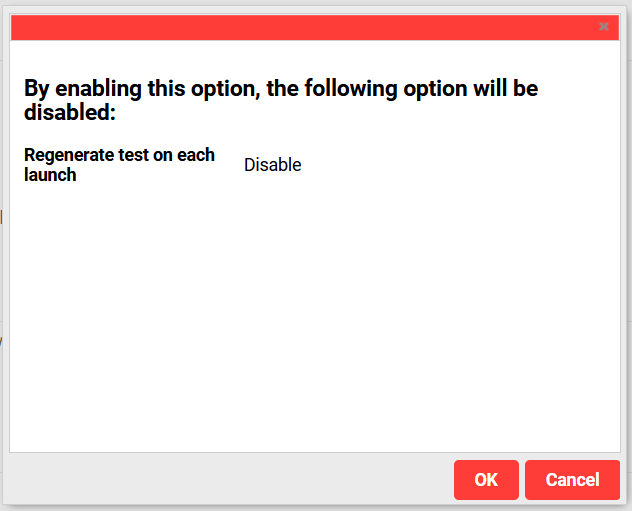
Display only questions which have wrong answers provided by the learner
When ticked, this setting will only display participants the incorrectly answered questions on the previous test attempt. This allows participants to reattempt tests while only needing to answer the questions they answered incorrectly in previous attempts.
only_questions_which_have_wrong_answers_by_the_learner.png?cb=355c5c8cb5db98d8f6fe93946bd0bd3c)
This option is incompatible with the Regenerate test on each launch setting. As such, it will automatically deactivate when one or the other settings are ticked and the OK button in the pop-up message is clicked.
Can be used offline
When ticked, this setting enables the Tests to be added to a Course in the Offline tests/feedback forms tab. Offline tests can be printed to paper and issued to participants in the traditional classroom environment; then results would be manually entered by a Tutor or Administrator.
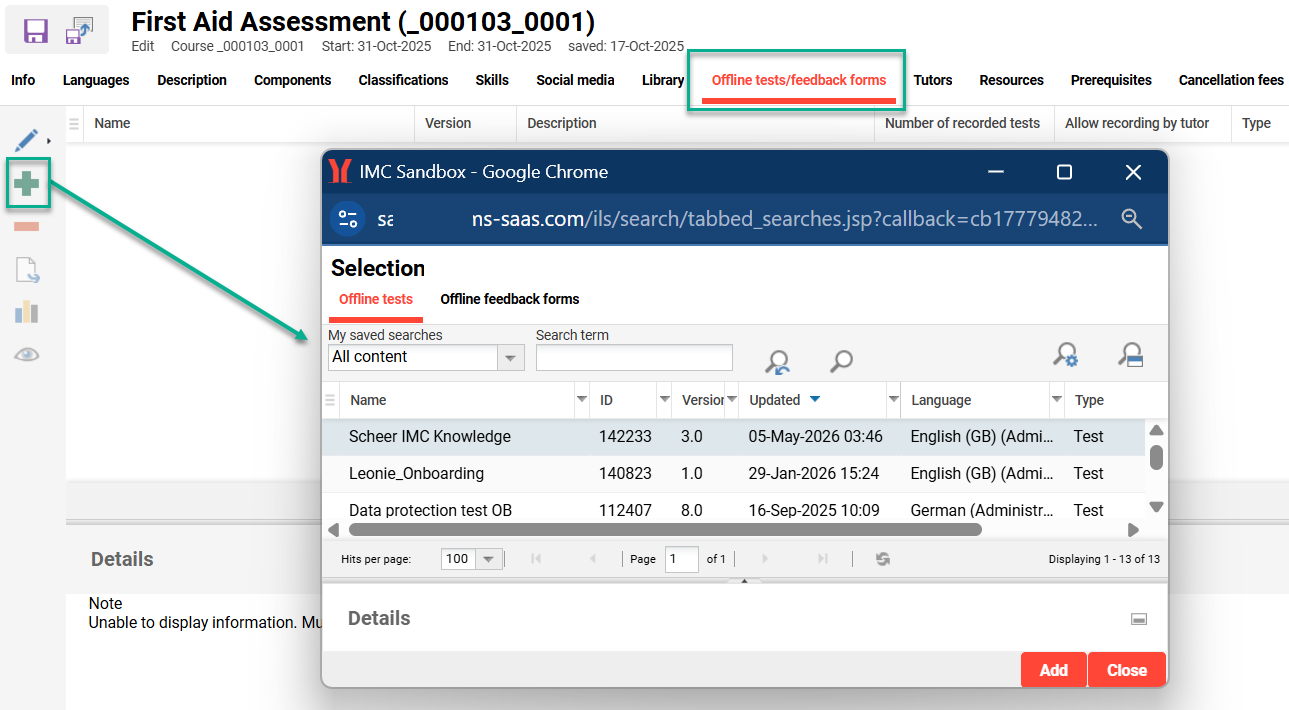
The Offline tests/feedback forms tab can be enabled at the Course type level in the Process complexity tab.
Lock with personal access code
When ticked, this setting requires that the participant enters a personal access code to start the Test. The personal access code will be automatically generated per course, per test, and per participant.
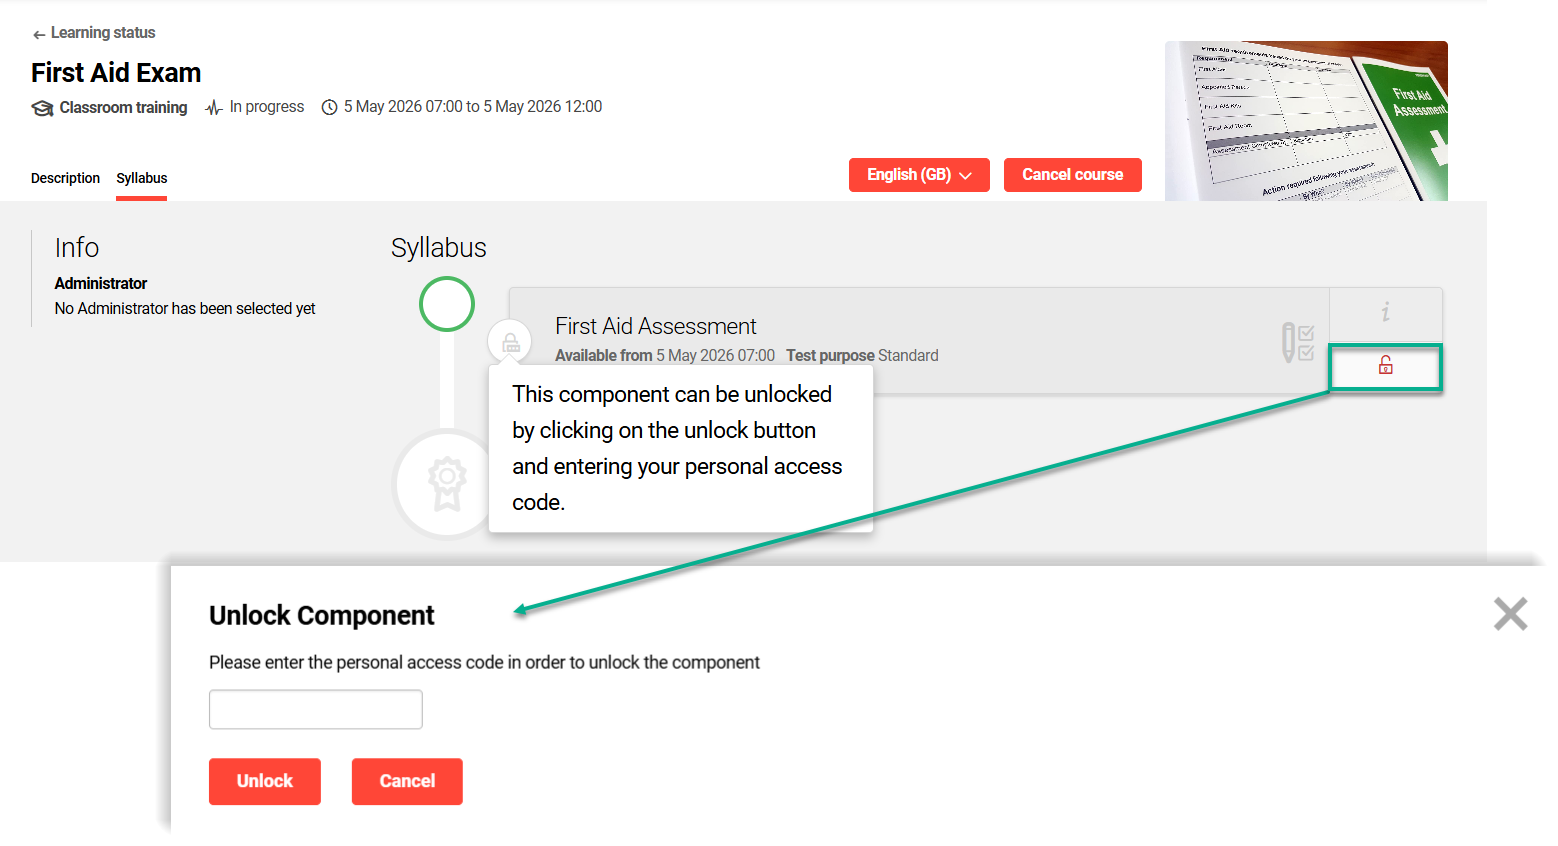
In the Course instruction function, either a Tutor or Administrator can trigger emailing of the access codes to the participants or their supervisors via the Send personal access codes via mail icon.
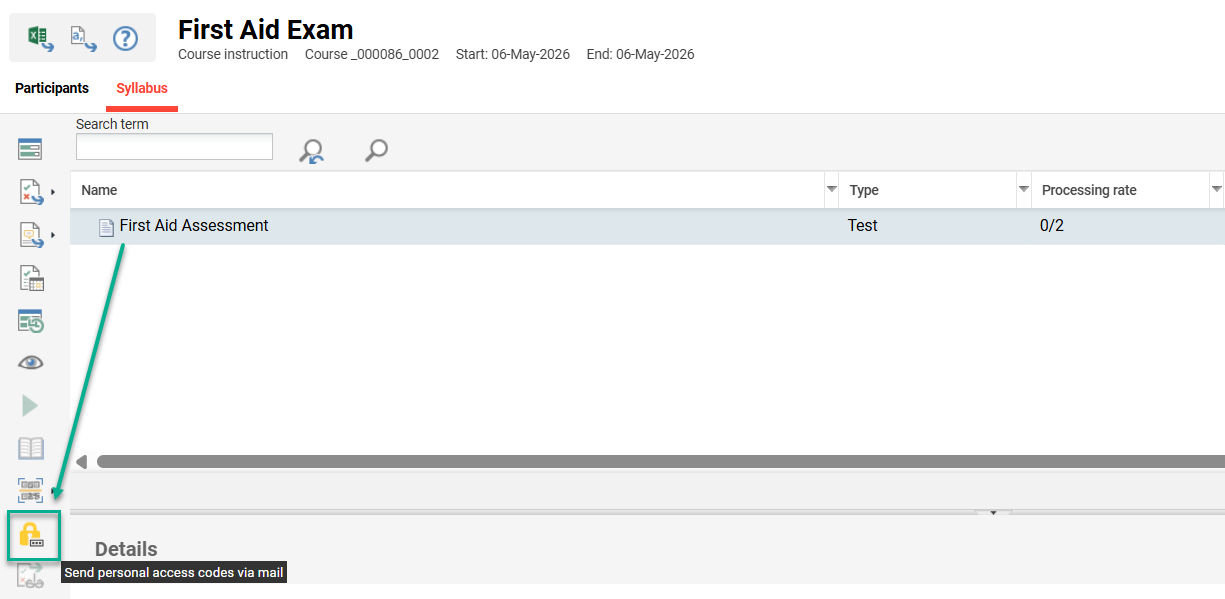
This setting will only work for Tests in Date-dependent courses that are scheduled.
Navigation Section
The section contains settings that enable the Test question processing order to be established.
Disable return to previous page (button will be hidden, navigation will be adjusted)
When ticked, this setting disables the Previous button. Use this setting to ensure test questions are processed in the original established order.
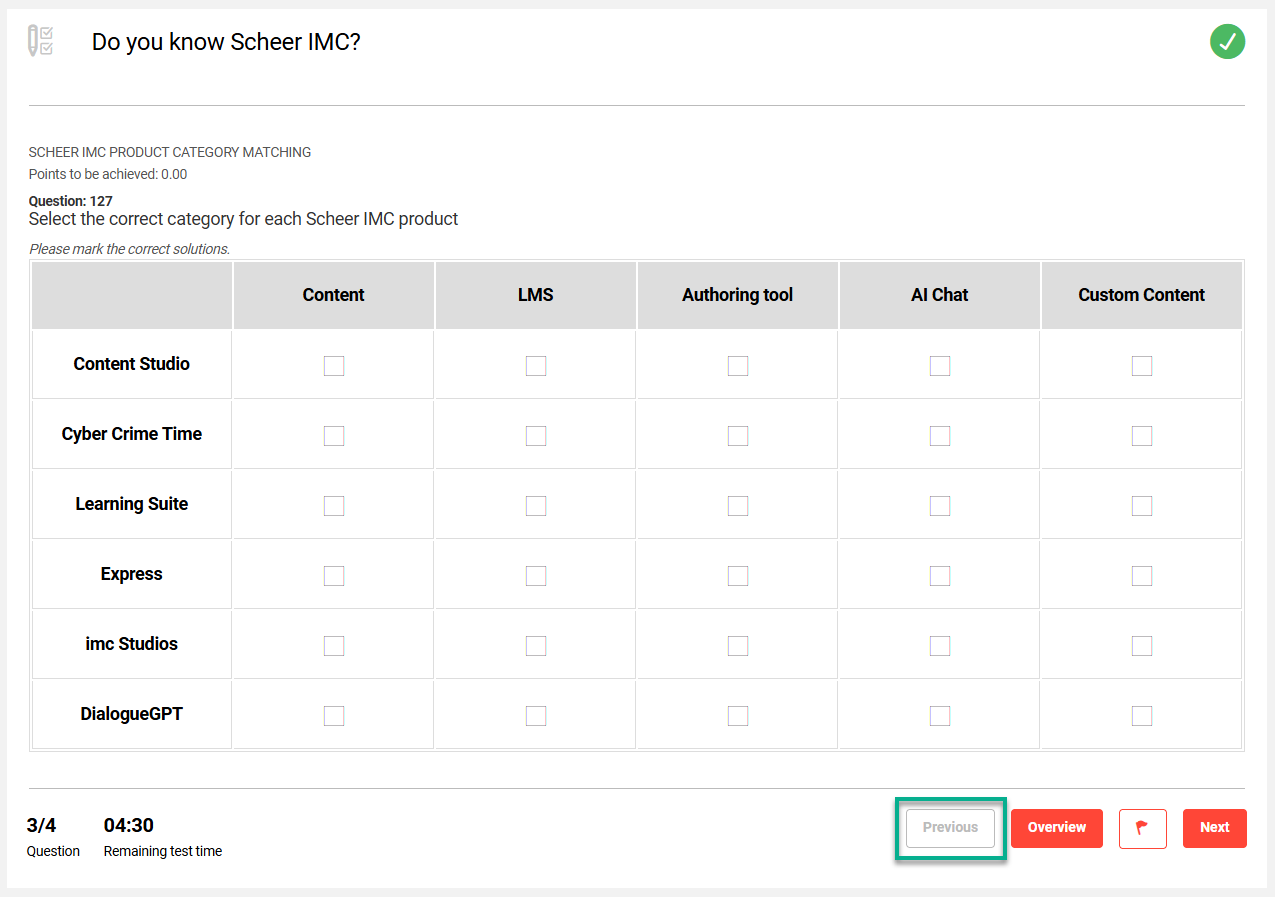
When enabled it will also no longer be possible to select questions directly in the question Overview screen. If ticked, it’s recommended to also tick the Require answer before proceeding to the next question setting.
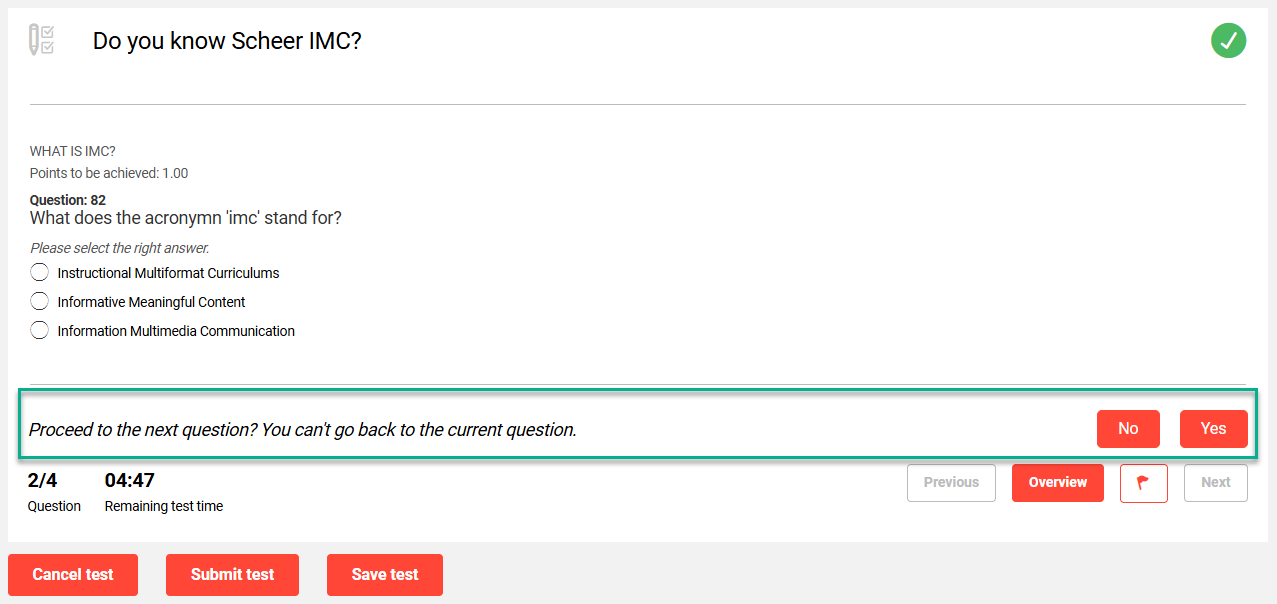
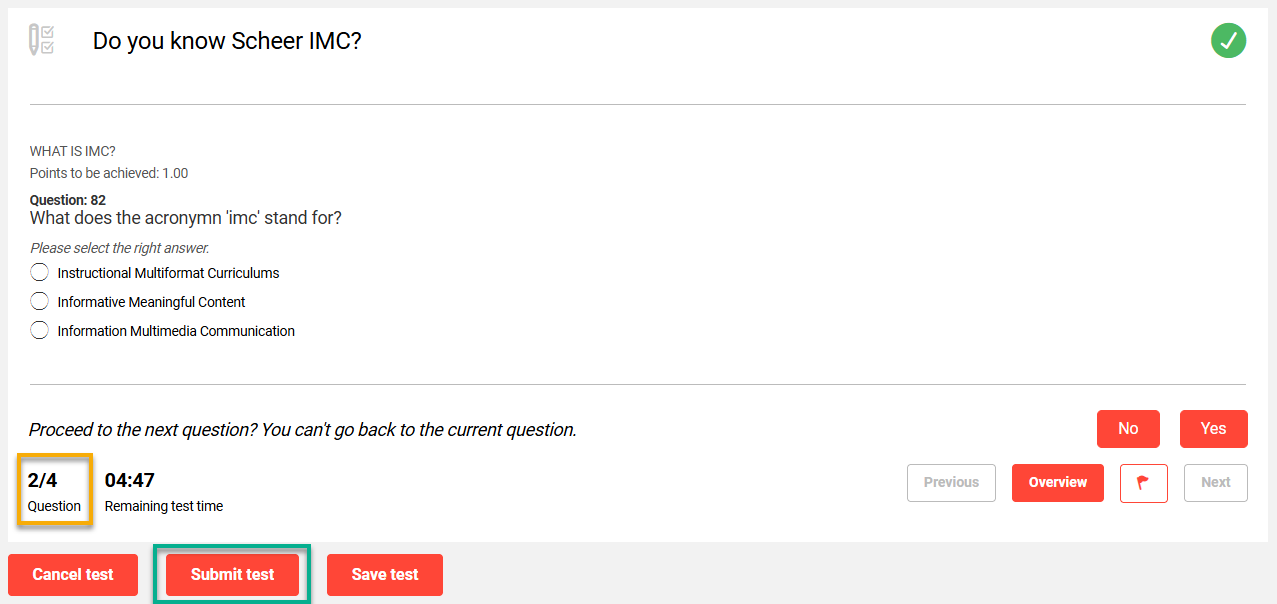
Show hint when “back” button is hidden
When ticked, this setting will display a warning message Proceed to the next question? You can’t go back to the current question with a No button and Yes button. This relates to the Disable return to previous page (button will be hidden, navigation will be adjusted) setting.
Start automatically
When ticked, this setting will directly take the participant to the first question. The activation of this setting is incompatible with the automatic or manual saving of the test and will always trigger a new test start when the test is opened. This setting is also incompatible with the privacy policy as this will be skipped.
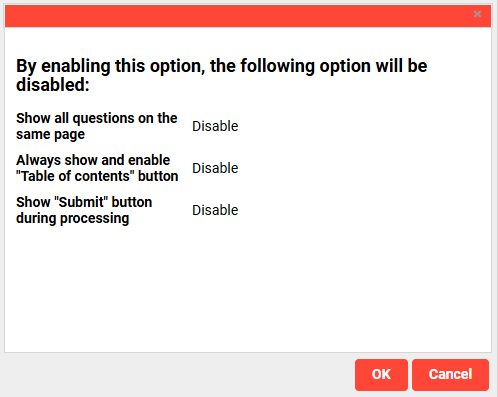
Require answer before proceeding to the next question
When ticked, this setting will require participants to answer each question before clicking the Next button. As a result of activation, the following settings will be automatically deactivated:
-
Show all questions on the same page
-
Always show and enable “Table of contents” button
-
Show “Submit” button during processing
Feedback Section
This section contains settings that determine how participants receive feedback on their answers.
Enable detailed feedback for questions
When ticked, this setting enables the activation of the subsequent settings to display feedback. The detailed feedback provides a view of correct answers for the questions. This feedback can be consolidated at the end of the test, or shown immediately after each question. The latter is only possible if the Previous button has been deactivated, as the function could otherwise be used to try to confuse results.
Display answers
When ticked, this setting will display the correct answer for each question (excluding free-text) in the detailed feedback. Where a Test allows multiple attempts it is recommended not to use this setting.
Show question-specific feedback
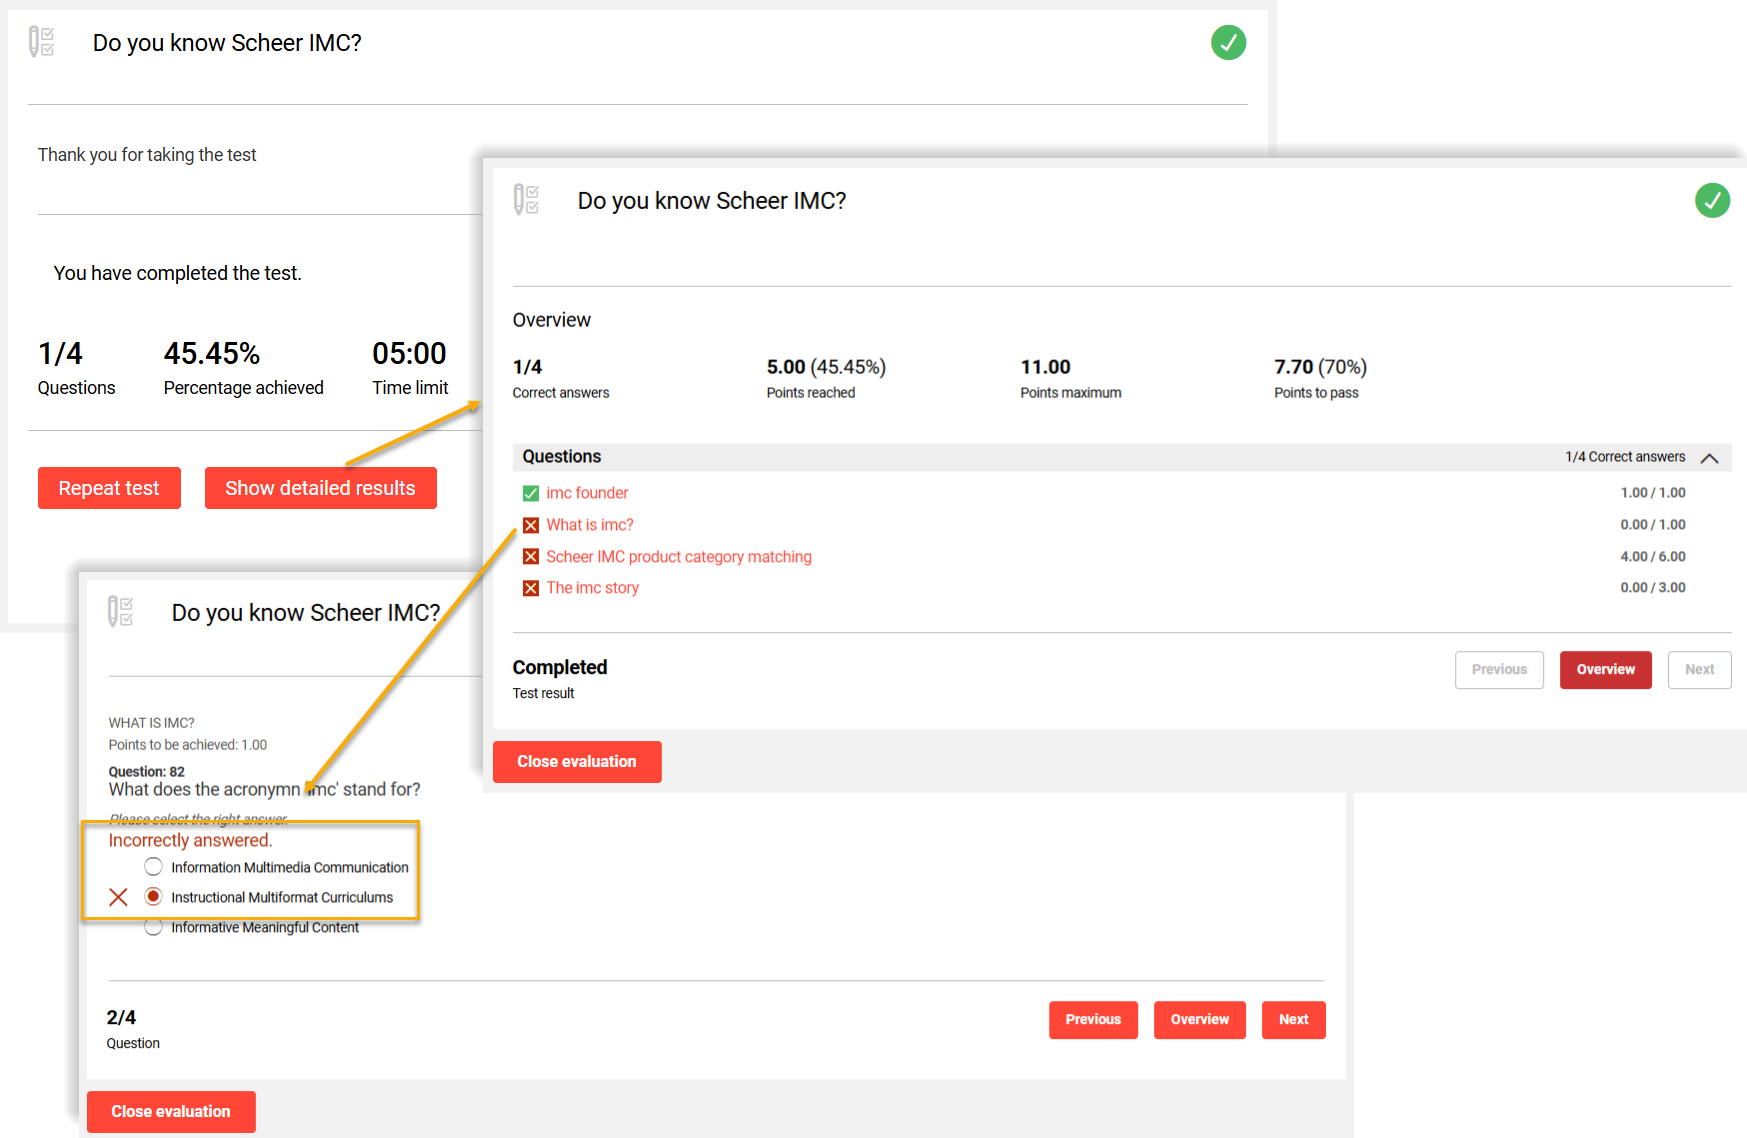
When ticked, this setting will display information in the Show detailed results overview on whether the questions were answered correctly. When clicking a question the entered answer is displayed along with text if the answer was right or wrong.
Show answer-specific explanations
When ticked, this setting will display a justification for each possible answer. The justification comes from the Argument field for each answer in the Test question.
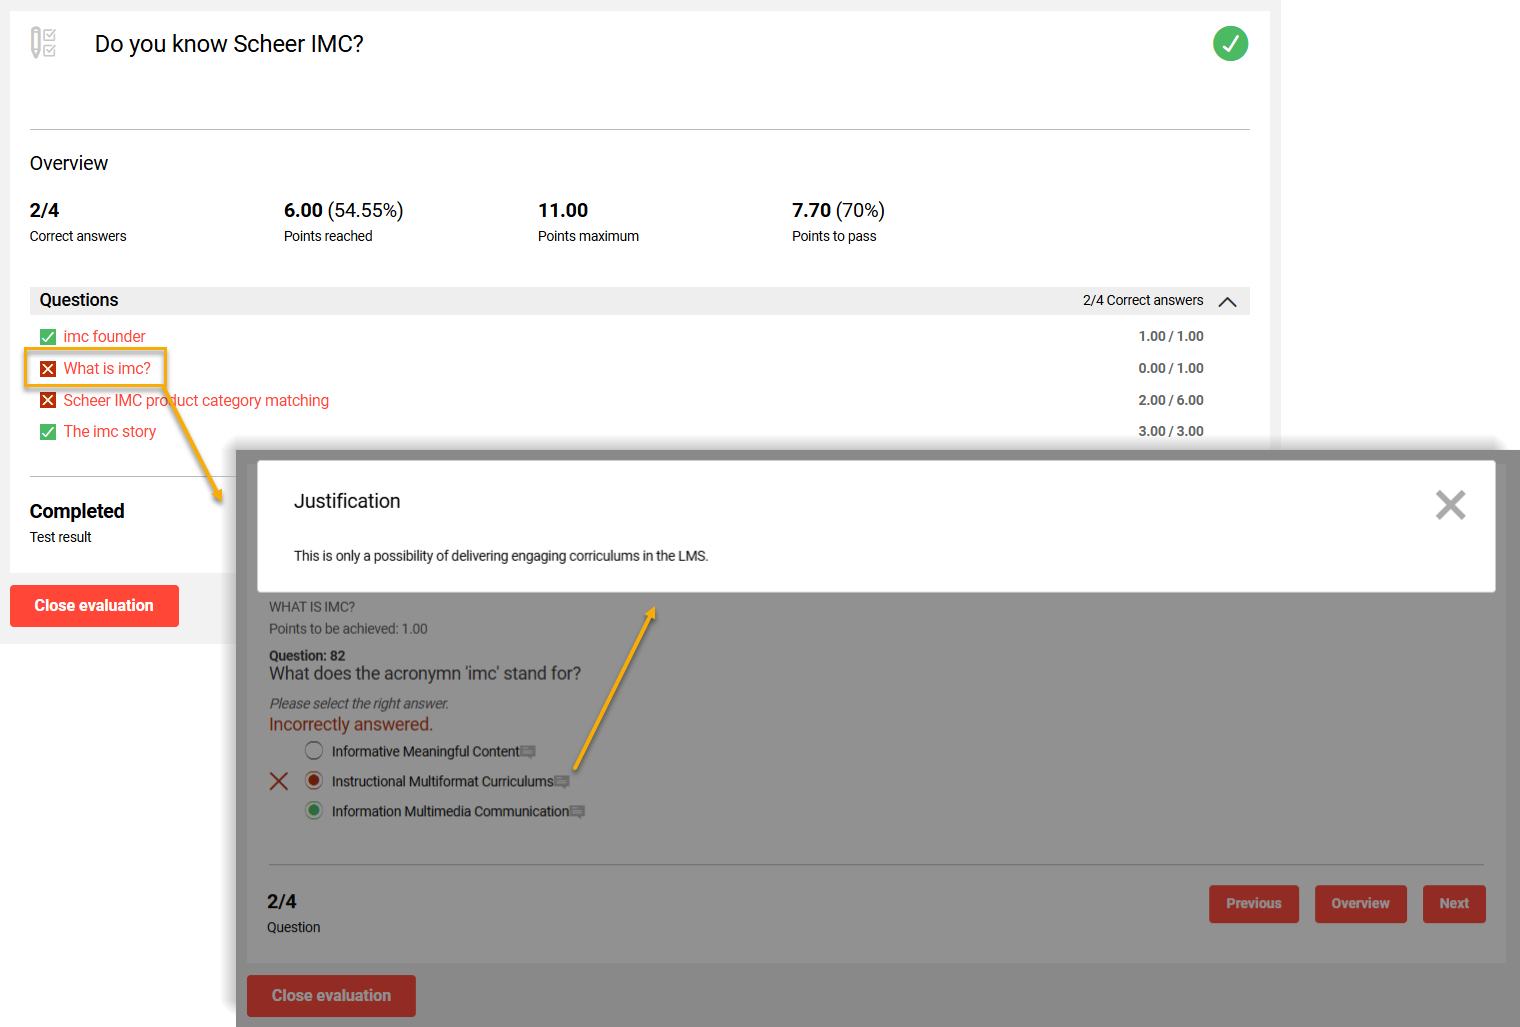
For a Free-text question, it's also possible to determine whether only the correction or also the sample solution is to be displayed.
Results Section
This section controls the display of the test results including information on how points are awarded and test rates are displayed.
Show "Submit" button during processing
When ticked, this setting will display the Submit test button at all times. When active the participant can decide to submit the test early prior to completing all questions; if doing so a warning will appear and confirmation is required.
Allow downward correction of results upon test repetition
When ticked, this setting will record the lower score if a Test is reattempted and the resulting score is lower. If the setting is not ticked and a lower score is submitted on a subsequent attempt, this will be ignored and a message will be displayed to the participant.
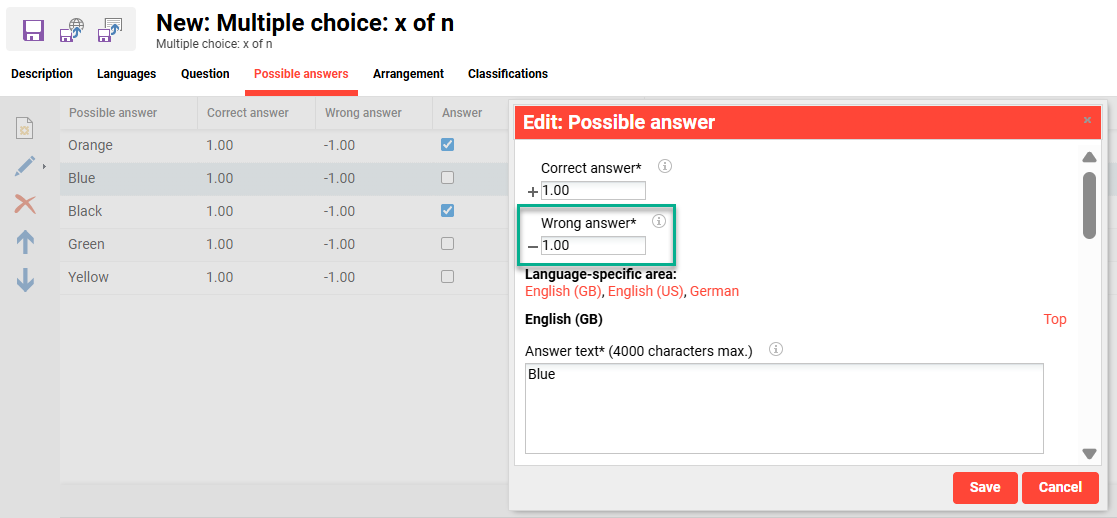
Count negative points
When ticked, this setting can deduct negative marks if the question grading has the Points for each possible answer checkbox ticked. The Wrong answer* field is available in x of n style questions including multiple choice and matrix. If negative marks are not applied in the Wrong answer* field, no downward grading will occur when an incorrect answer is selected. Incorrect answers can reduce the score for the entire question to 0 points (not negative).
Show points obtained per question
When ticked, this setting will show the point obtained for each question in the Detailed results overview.
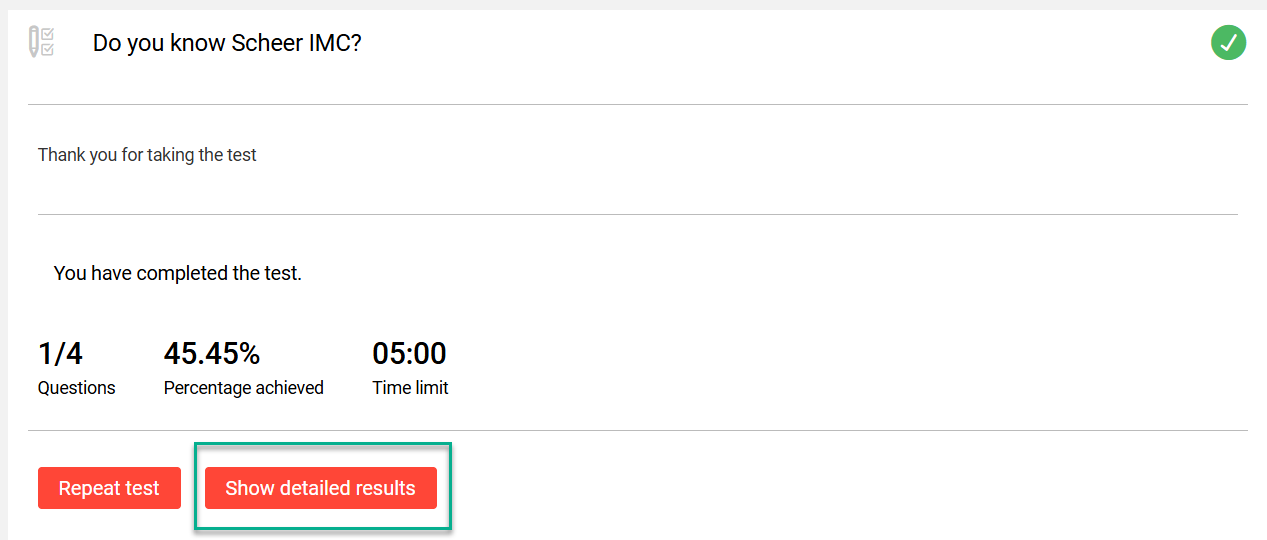
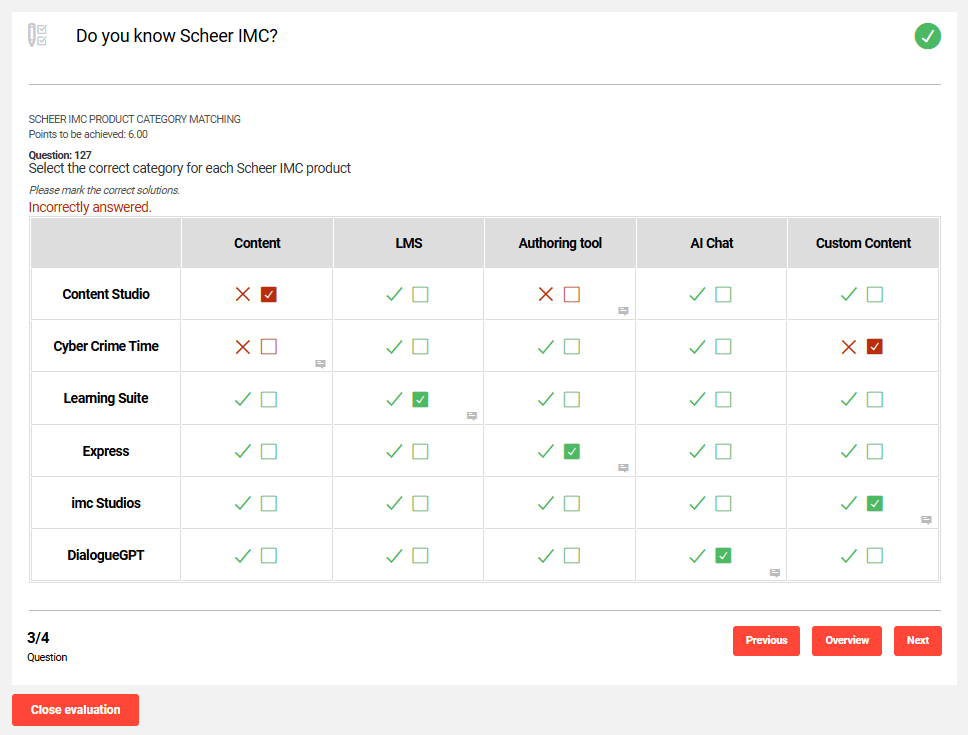
Show table of results after processing
When ticked, this setting displays a summary table of all question results when the Show detailed results button is clicked. If not ticked, the results are shown individually per question.
For this the Enable detailed feedback for questions setting in the Feedback section must be ticked.
Show score per folder (pts.)
When ticked, this setting shows the number of points that can be earned per question. This is shown when editing the question and on the overview page.
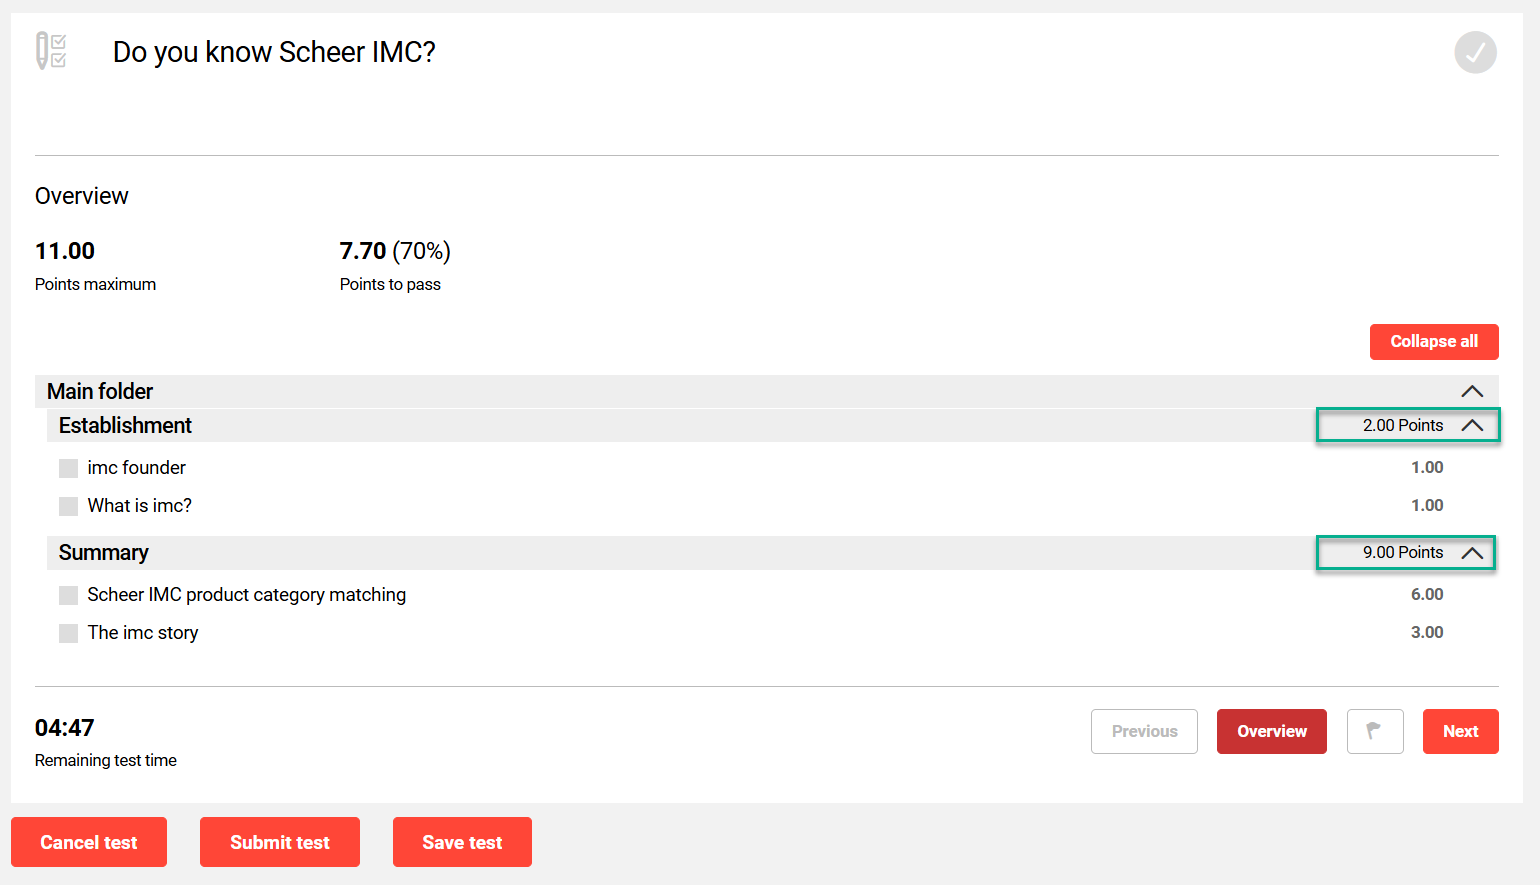
Requires the Show questions in their folder structure setting in the Assignment section to be ticked.
Display the file status
When ticked, this setting indicates whether the minimum number of points have been achieved per sub-folder (if defined). The option is displayed to the left of the folder name.
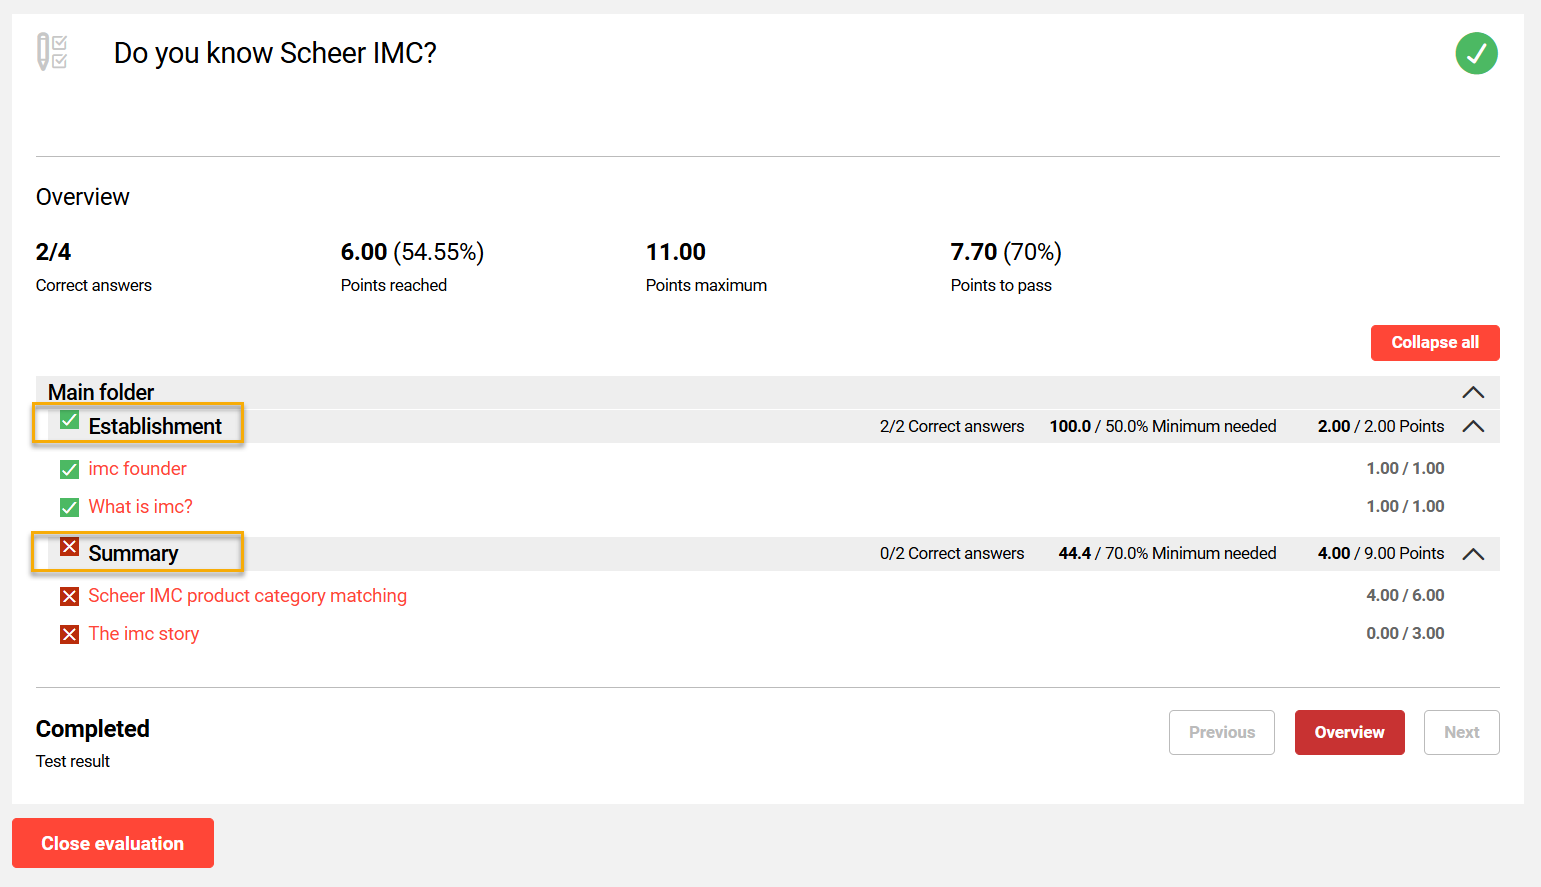
For this to be enabled, the Enable detailed feedback for questions setting in the Feedback section and the Show questions in their folder structure setting in the Assignment section must be ticked. In the Test there must also be values defined per folder in the Rating tab.
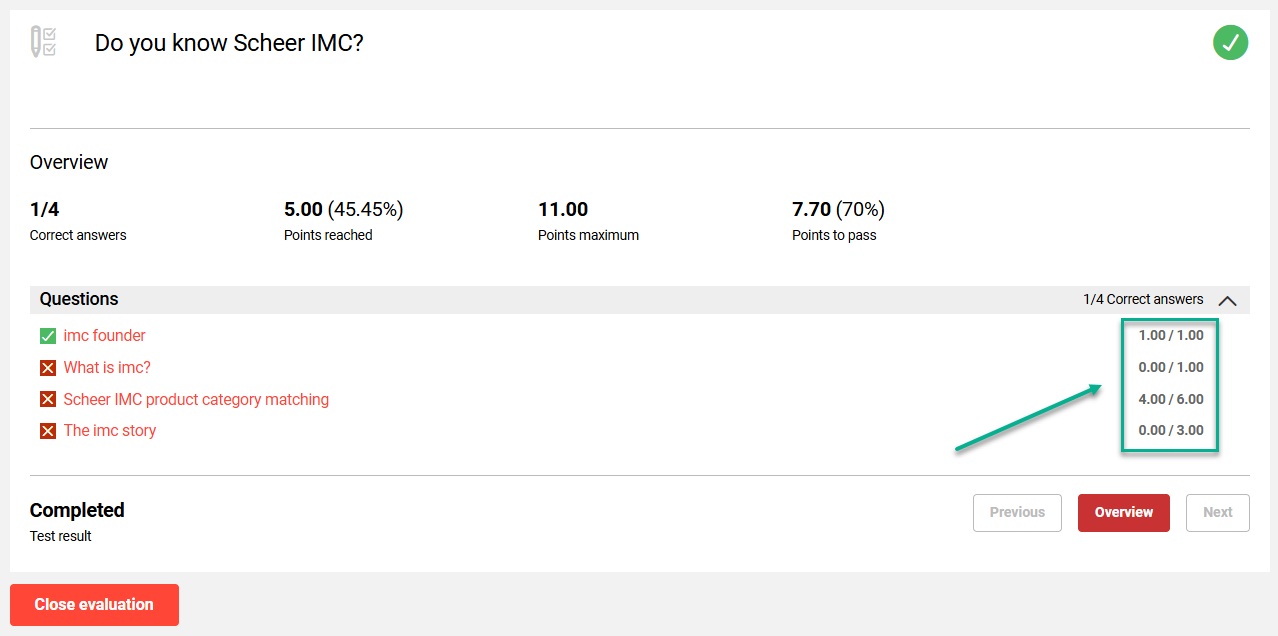
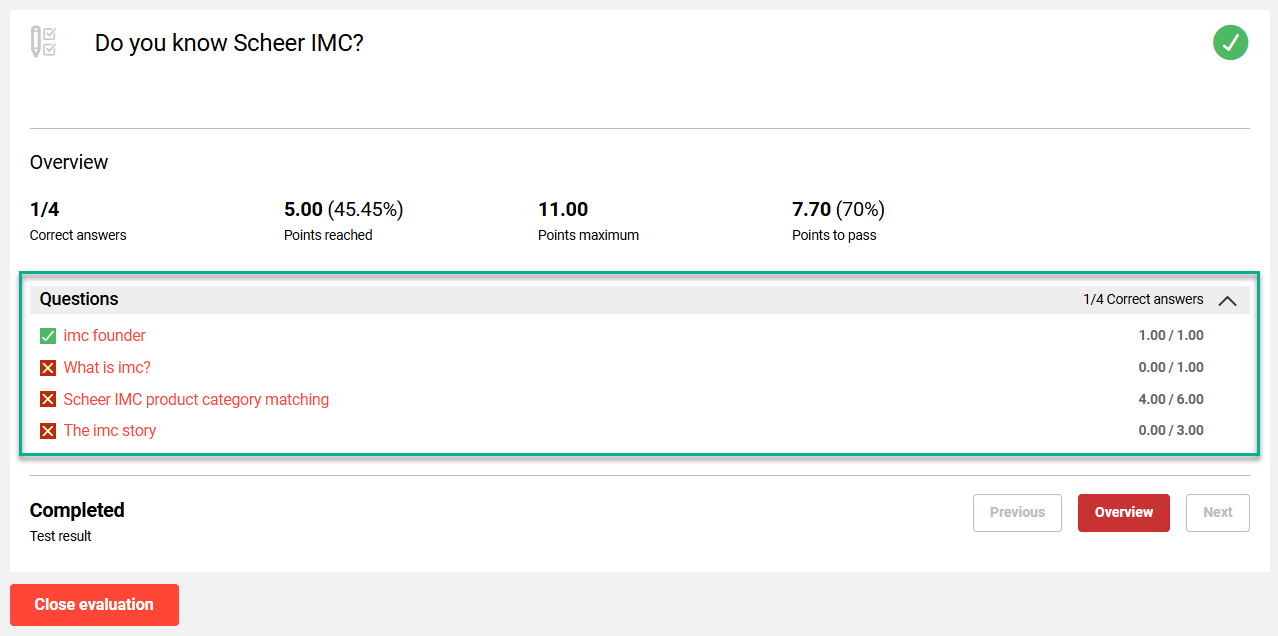
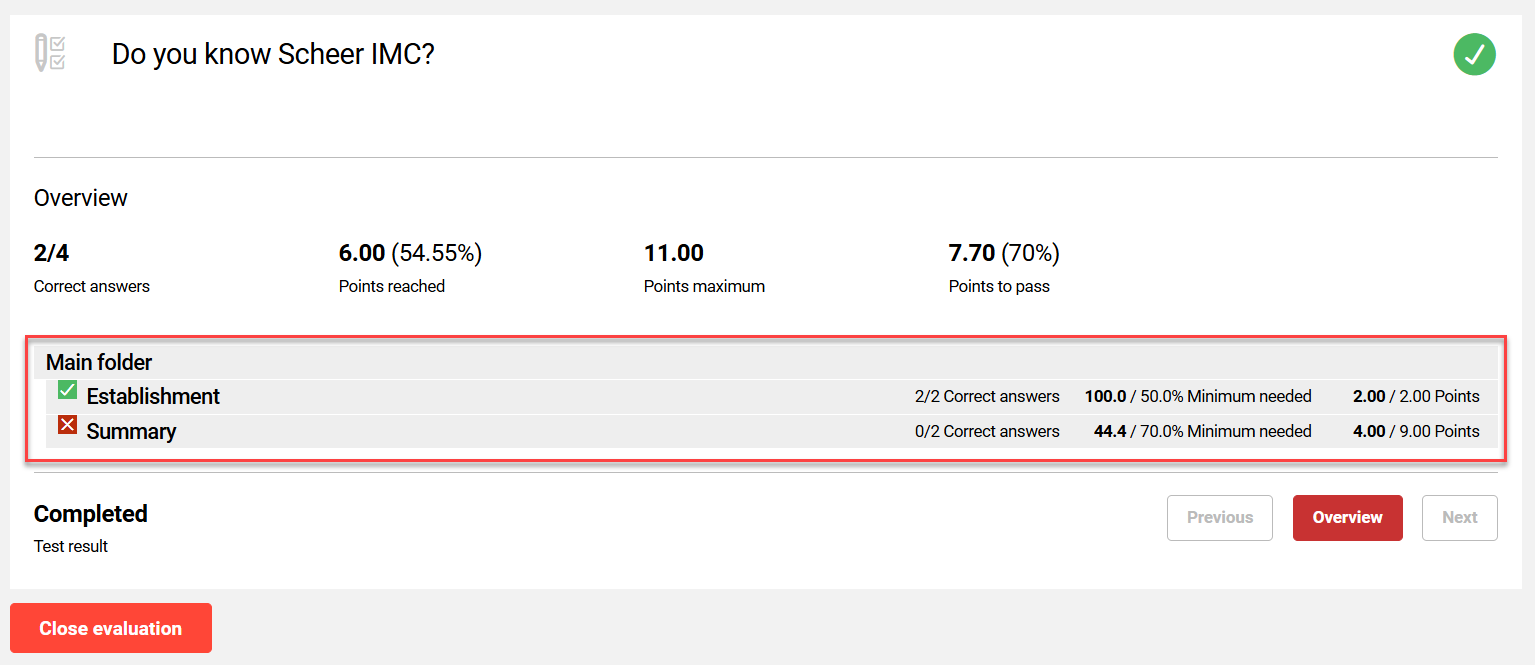
Allows the extension/reduction of the folder structure in the detail evaluation
When ticked, this setting enables expanding folder structures to display questions when the Show detailed results button is clicked. If unticked, only the folders will be visible without the expand arrows as per the image below:
Show overall test score (pts.)
When ticked, this setting shows the achieved score for the test.

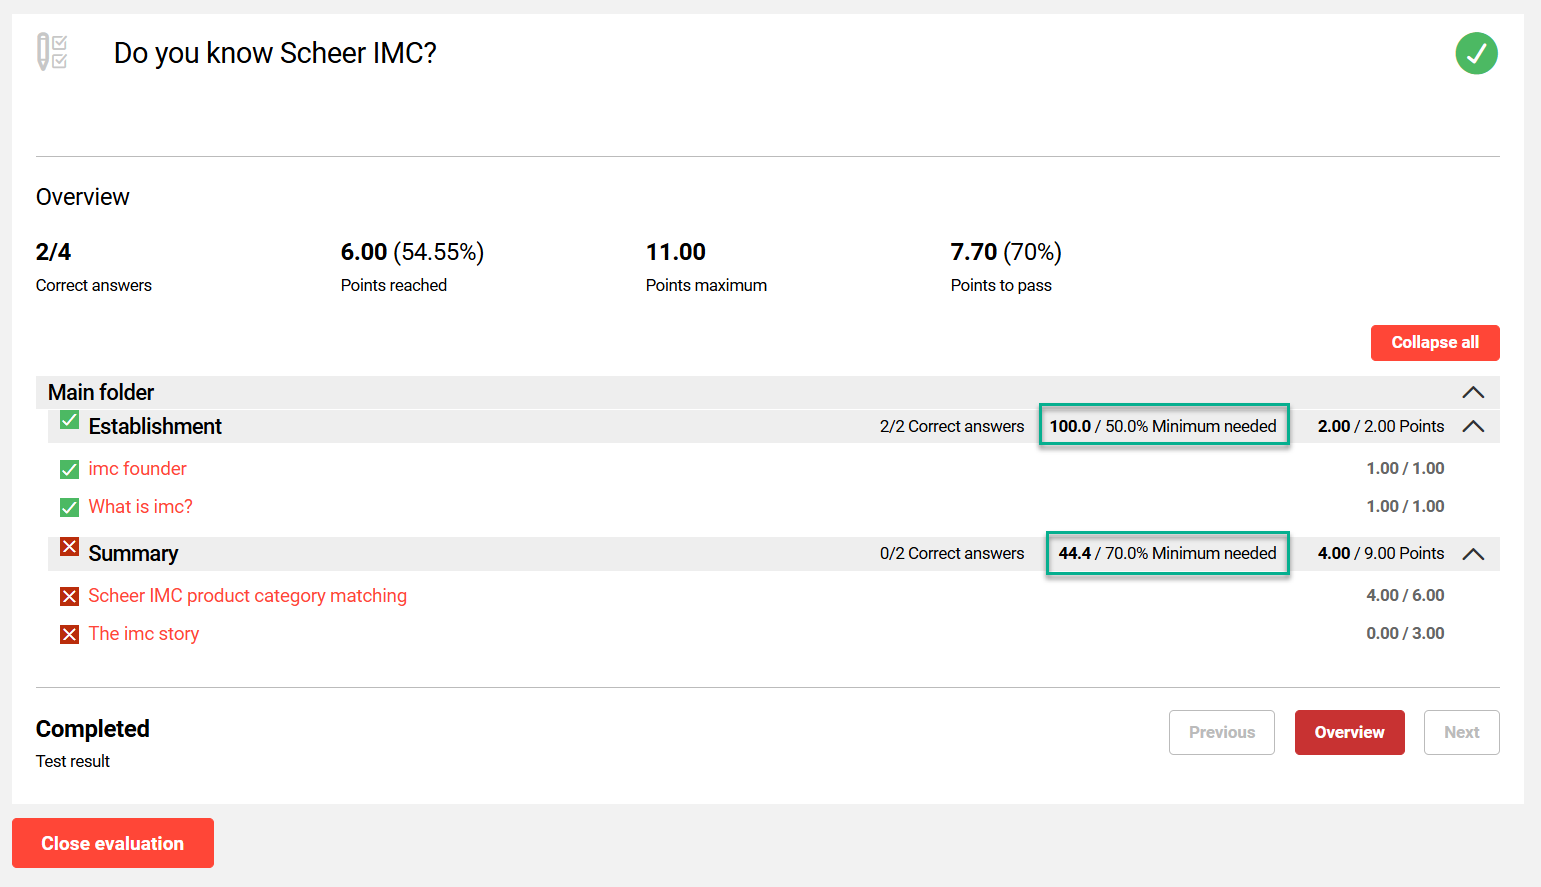
Show score per folder (%)
When ticked, this setting shows the score achieved per folder as a percentage of the total possible marks. This option can only be enabled if, under "Assignment", the option to display questions in a folder structure has been selected.
Show overall test score (%)
When ticked, the setting shows the achieved score for the test in percentage.
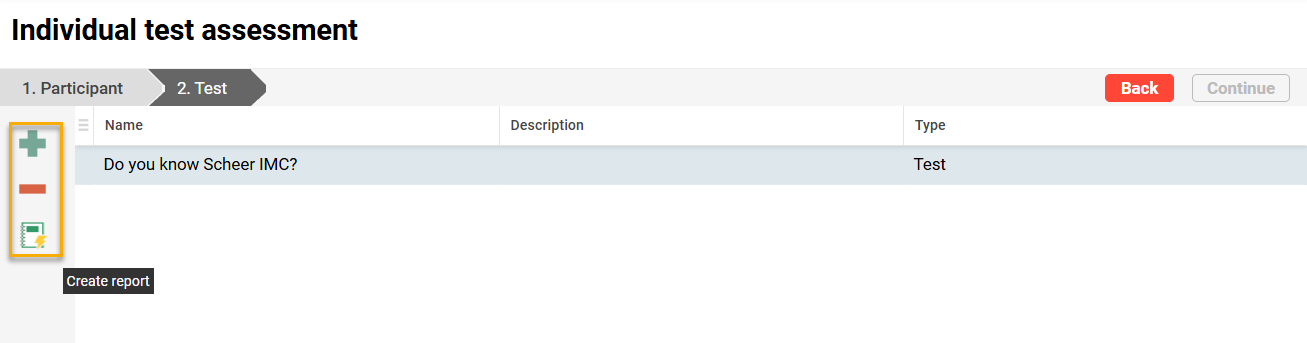
Include test in report "Individual test report"
When ticked, this setting enables the reports to be added in the test to the Individual test assessment report. This report requires first selecting users, then the desired test, and generating a report.
Display test result as "concluded" rather than "passed" or "not passed"
Select this to hide the test results from the participant. Instead of showing either ‘Passed’ or ‘Failed’ status, the result will show as ‘Completed’.

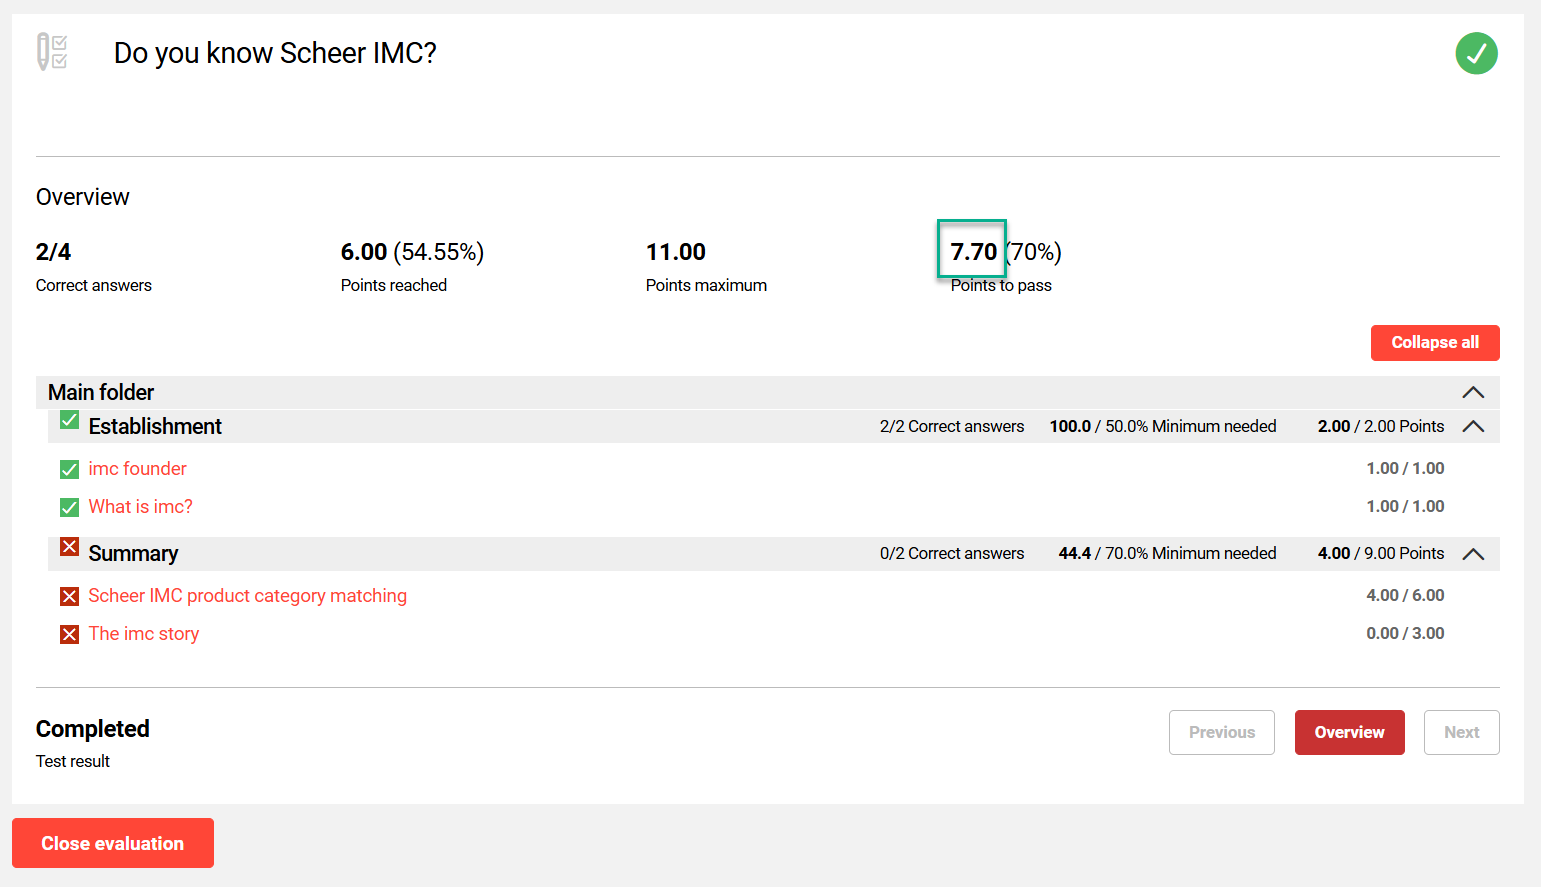
Show points required to pass (.pts)
When ticked, this setting shows the number of points required to pass the test.
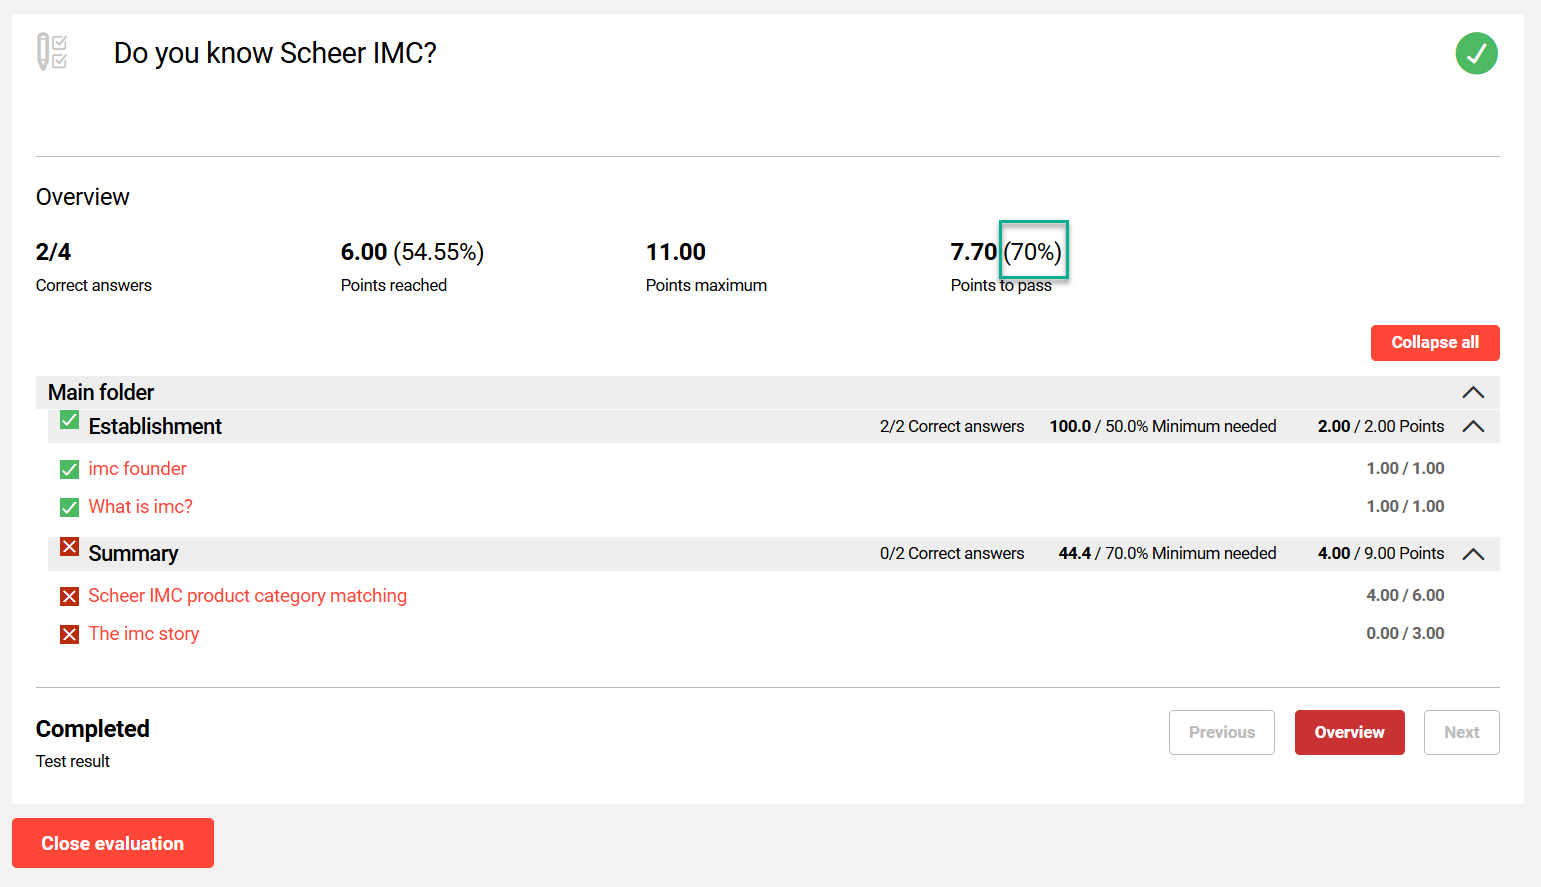
Show points required to pass (%)
When ticked, this setting shows the achieved percentage required to pass the test.
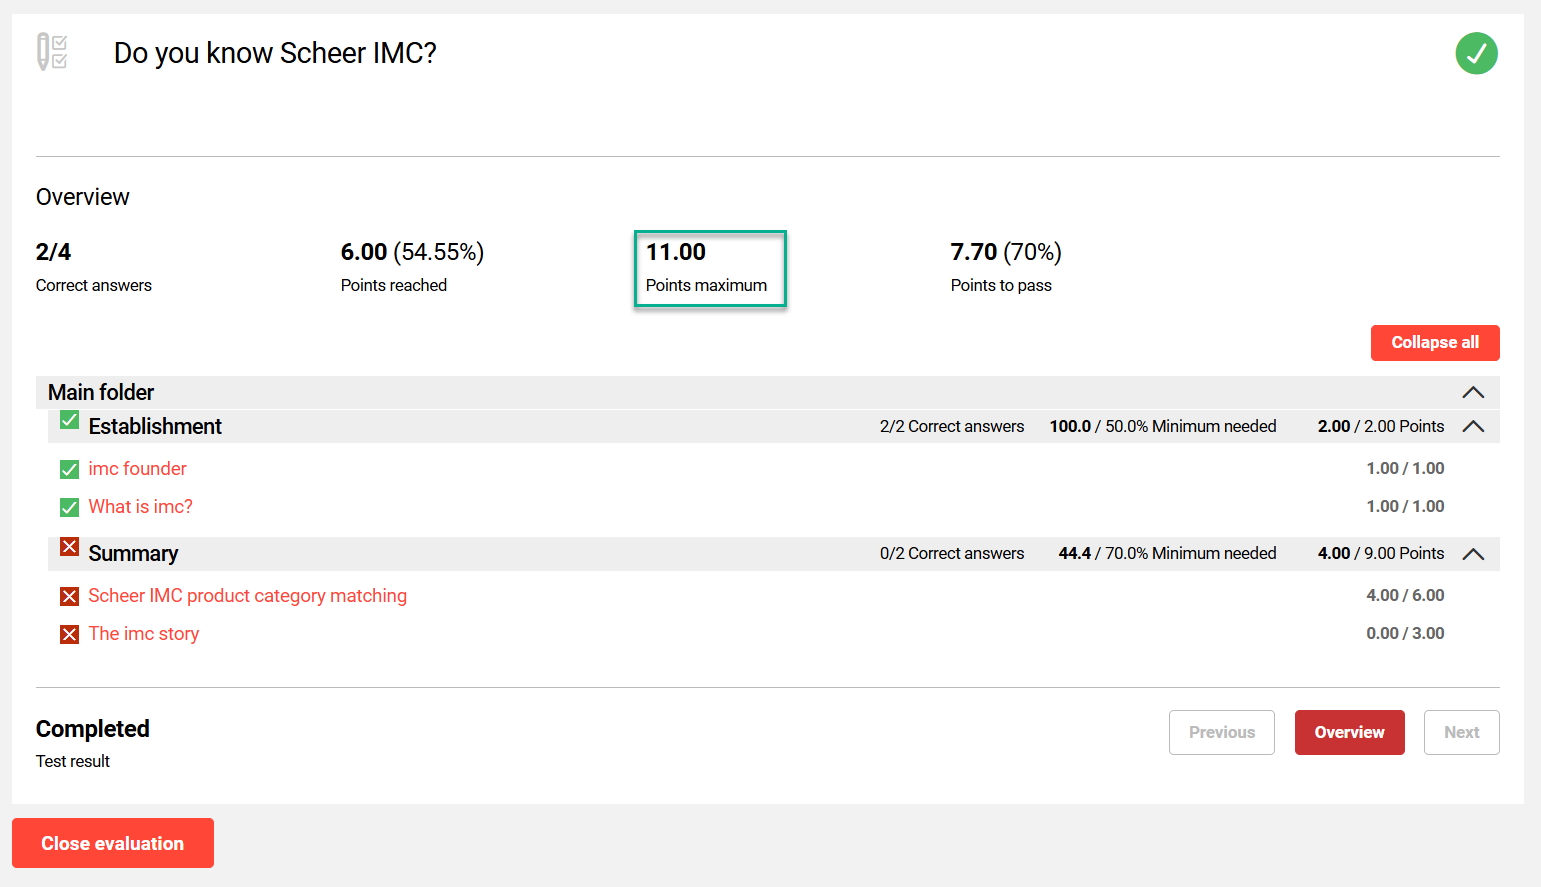
Show maximum points (.pts)
When ticked, this setting shows the maximum number of points that can be achieved in the test. The Points maximum is displayed both prior to starting the test and in the detailed results overview.
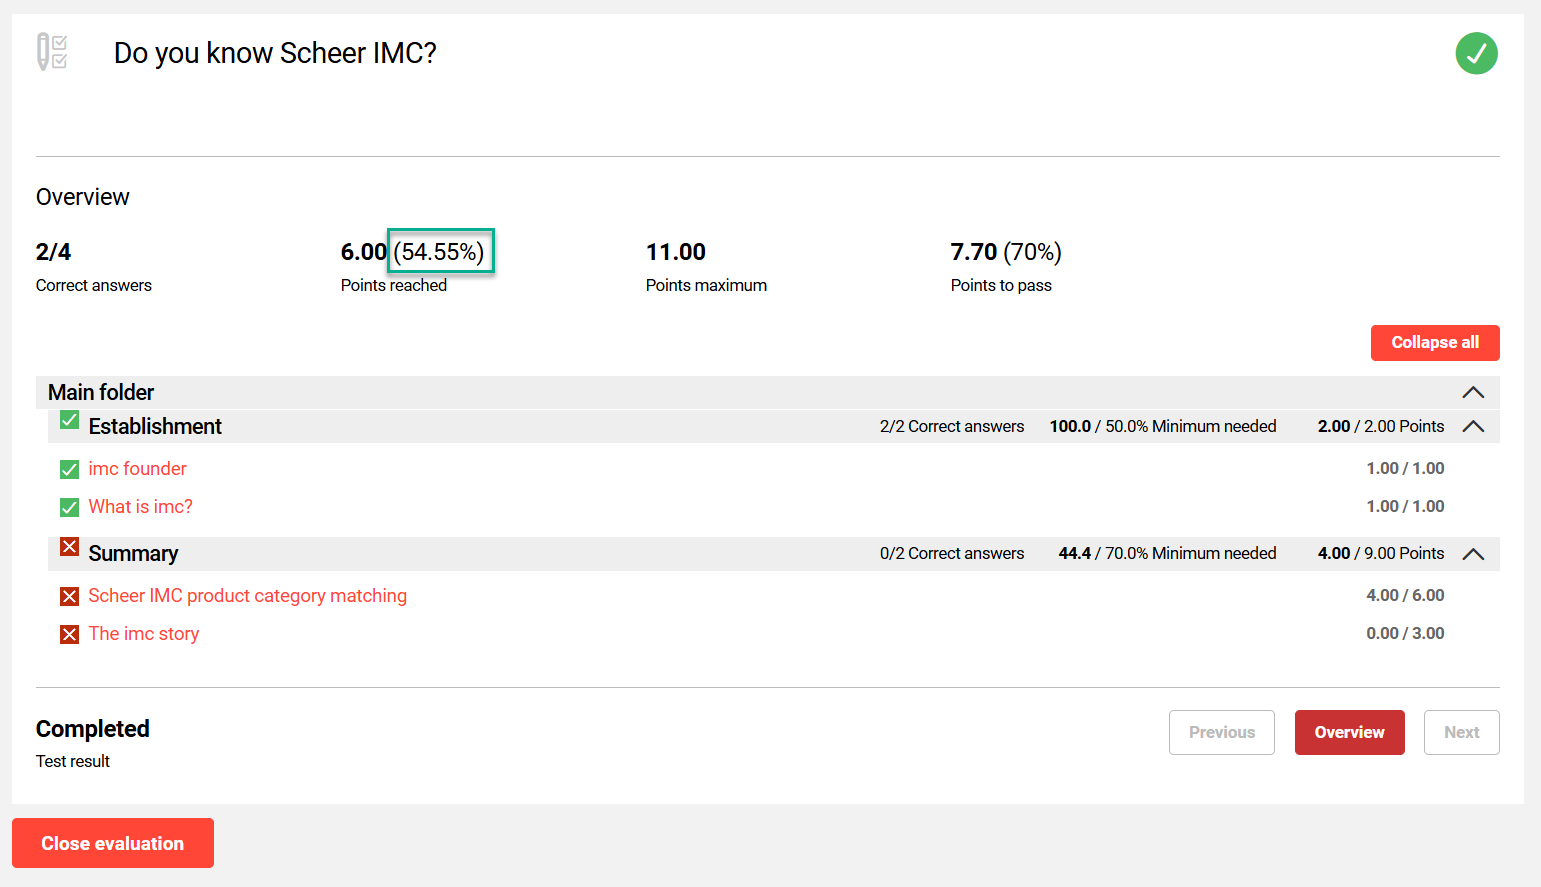
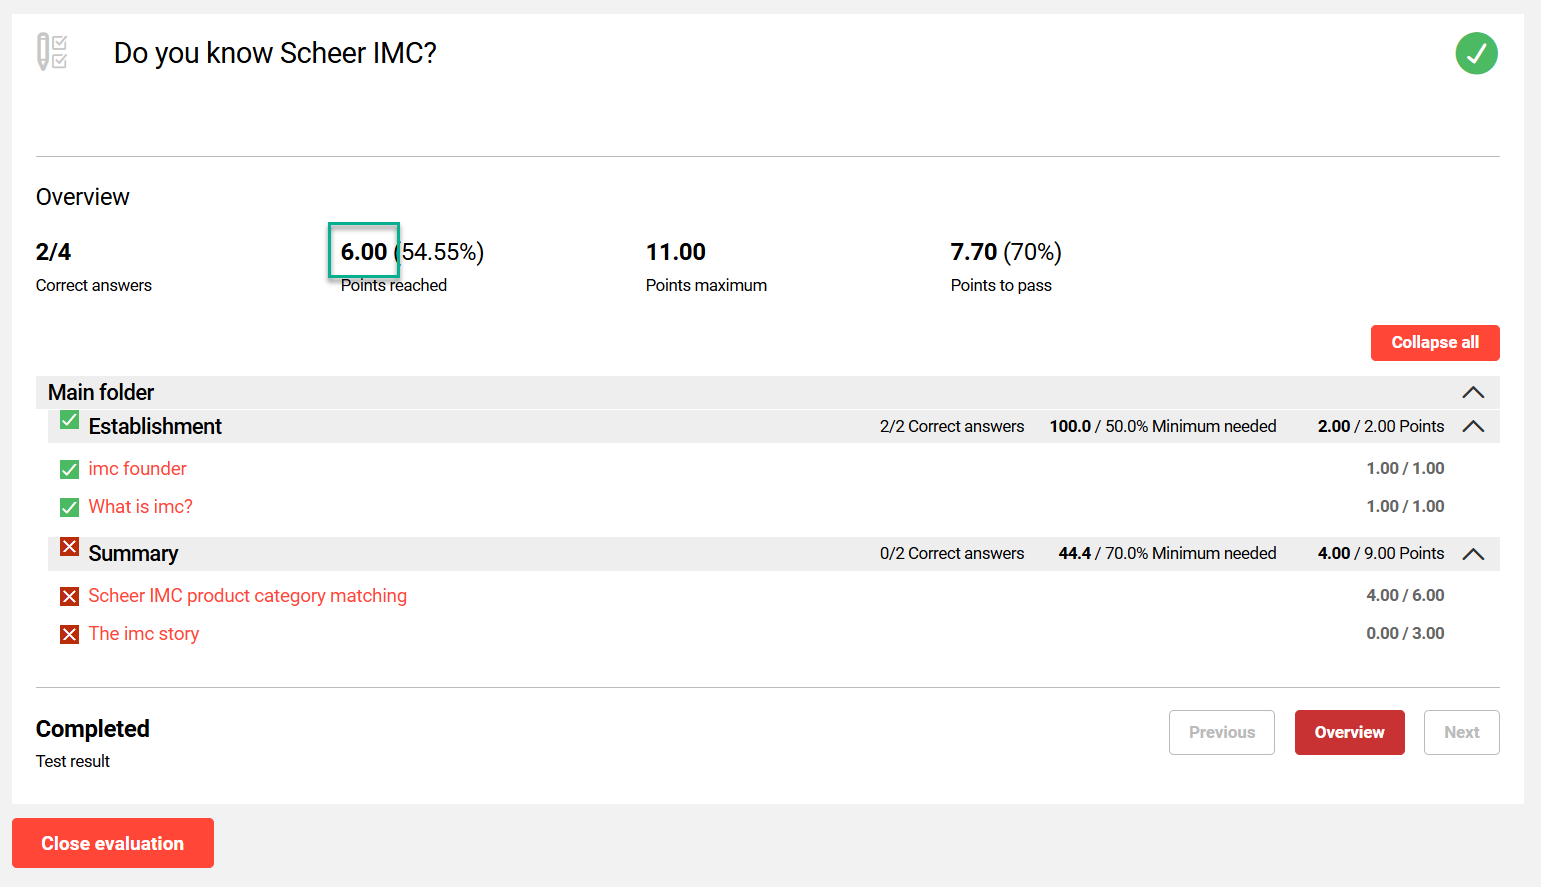
Show points reached (.pts)
When ticked, this setting shows the number of points received for the test.
Show points reached (%)
When ticked, this setting shows the percentage of maximum points received for the test.

Display Section
This section contains options for displaying question-specific information within the test.
Arrange potential answers to single-response and multiple-response questions randomly
When ticked, this setting randomises the order of the answer options in various question types (e.g. multiple choice, matrix, arrange). This can be beneficial when a test can be repeated to prevent the participant memorising the position of the correct answers.
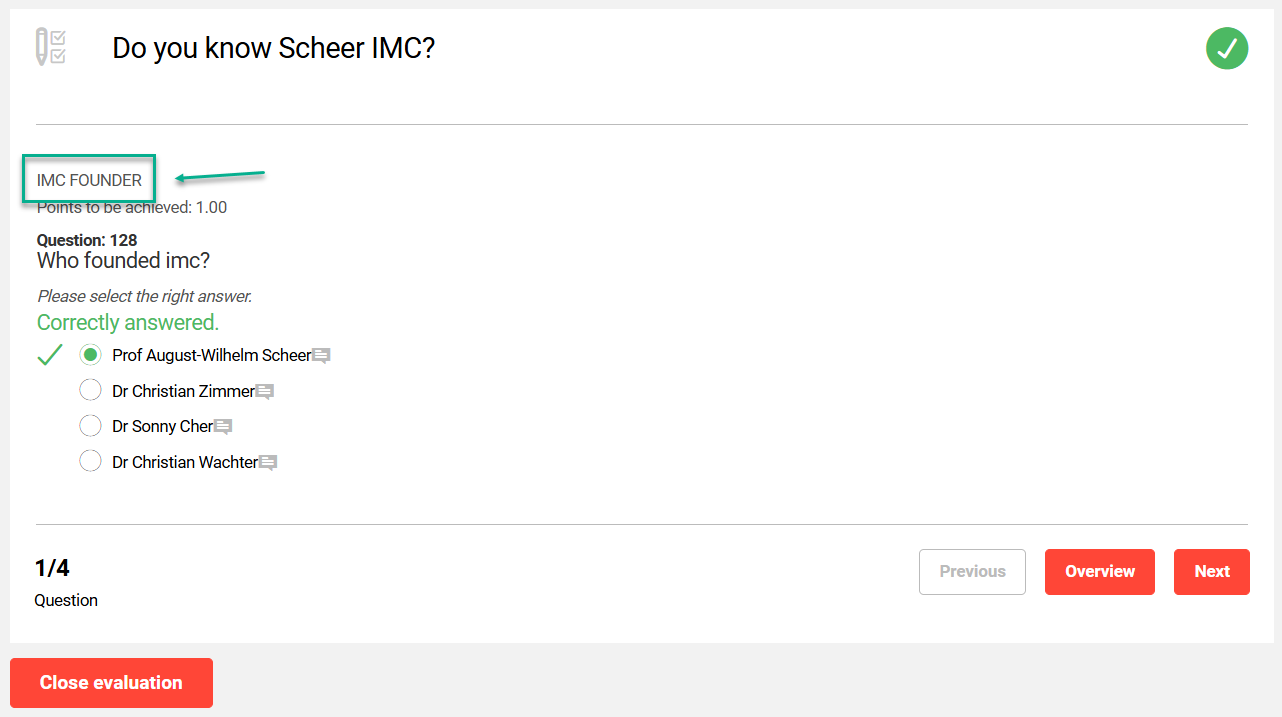
Show question name in header
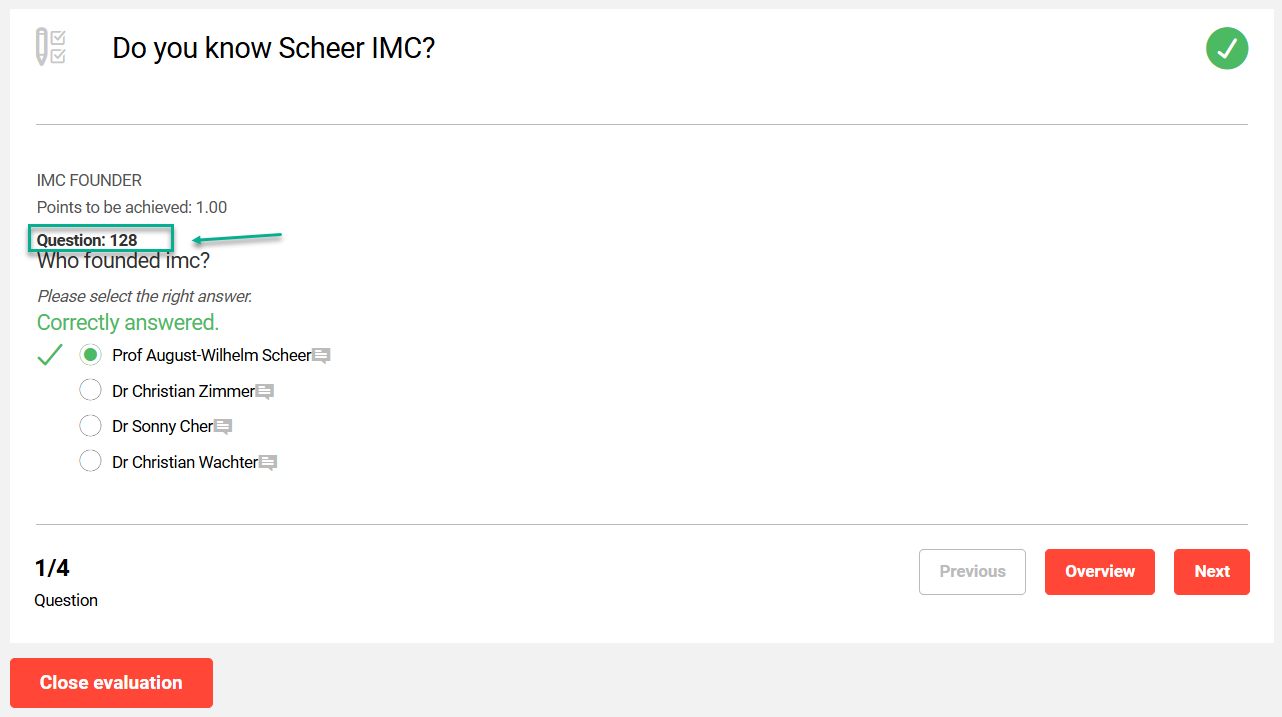
When ticked, this setting shows the name of the question above the question. The question name can also be viewed on the overview page. When the name has little meaning to the participant, this should be unticked.
Show question number
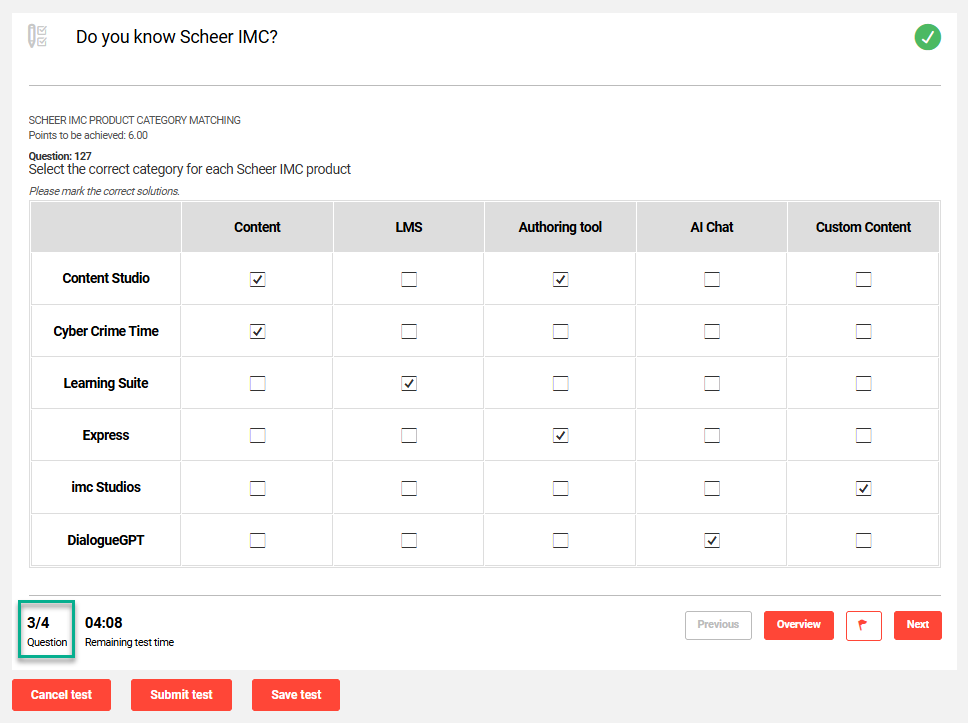
When ticked, this setting will display the question number above the question. The number is a sequential number generated by the imc Learning Suite during question creation; not the order number of the question within the test. Including the number can assist administrators, but may confuse participants.
Show number of processed questions
When ticked, this setting displays the number of questions and the position of the current question. For a long test with a time limit, this information can be important to a participant.
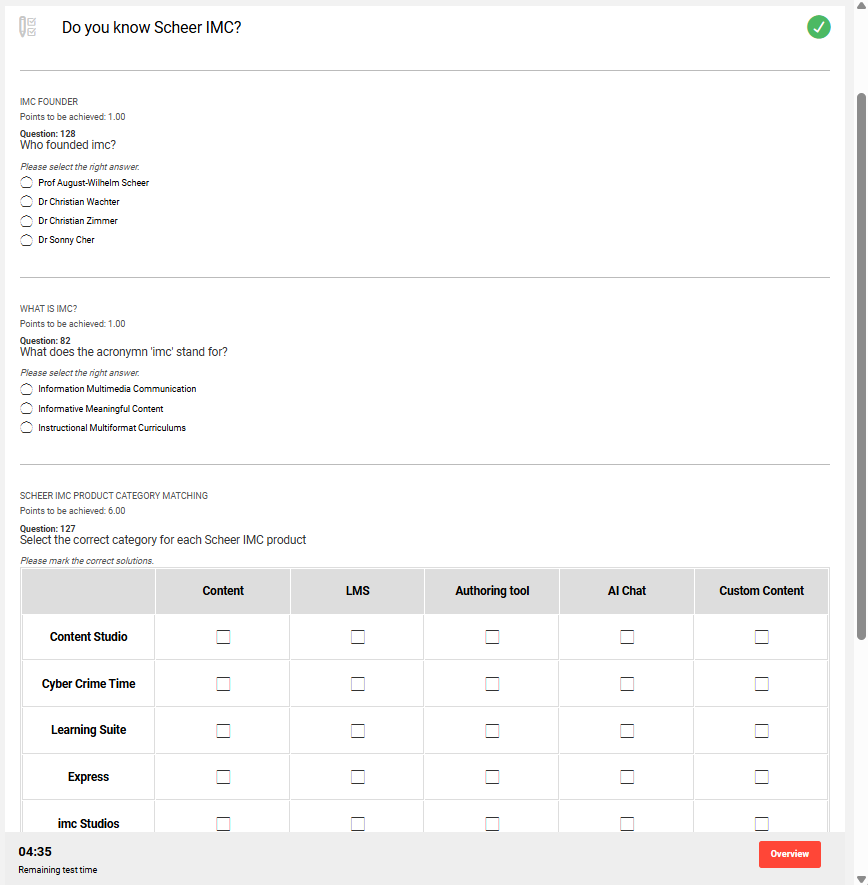
Show all questions on the same page
When ticked, this setting can enable the display of all questions on the same page. For this to occur the Show “Submit” button during processing and Save automatically after each question settings must be unticked.
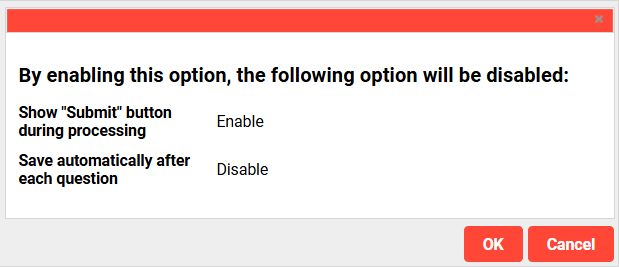
Displaying all the questions on the same page is optimal for tests with a lower number of questions (10-30). A higher number of questions will increase scrolling and generate a higher loading time, impacting the browser’s and device’s performance.
This can only be ticked if the Require answer before proceeding to the next question checkbox is unticked.
Processing time Section
This section contains settings relating to processing time limits for the test and displayed information.
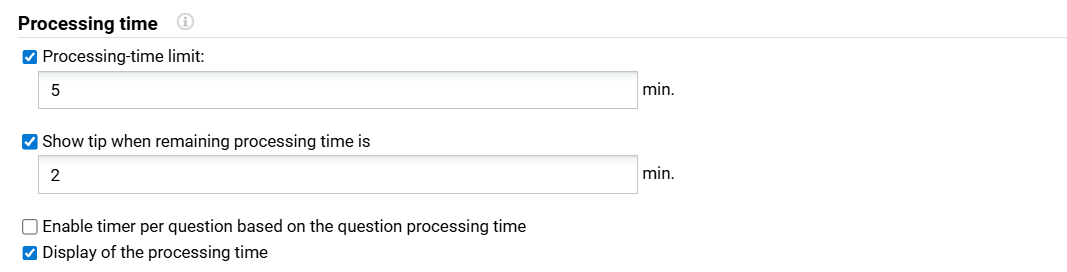
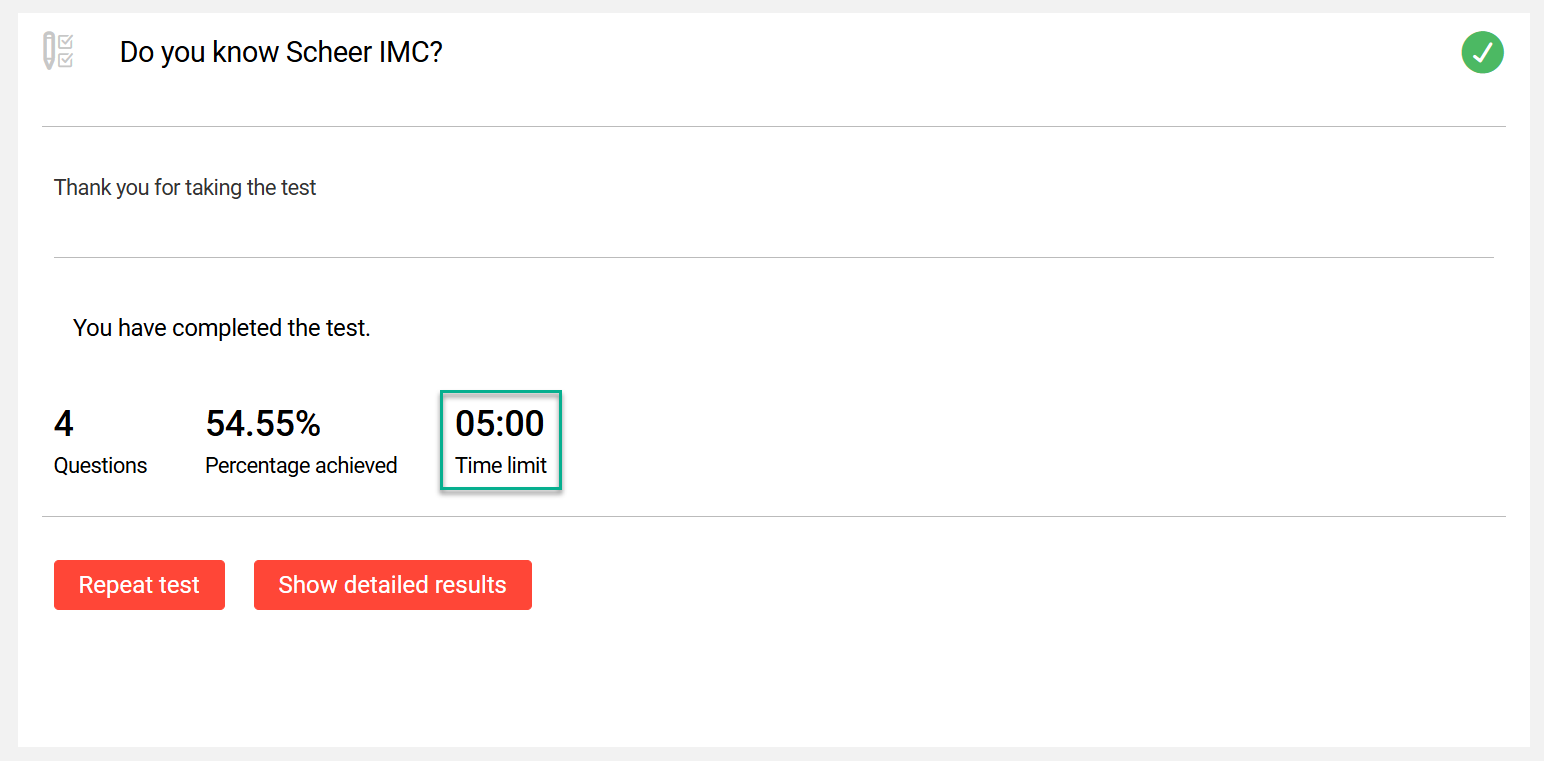
Processing-time limit:
When ticked, this setting enables defining a maximum processing time in minutes for the test. If processing times were defined at question level, these will be overwritten. If no total processing time is defined, the total of the processing times defined at question level will be used.
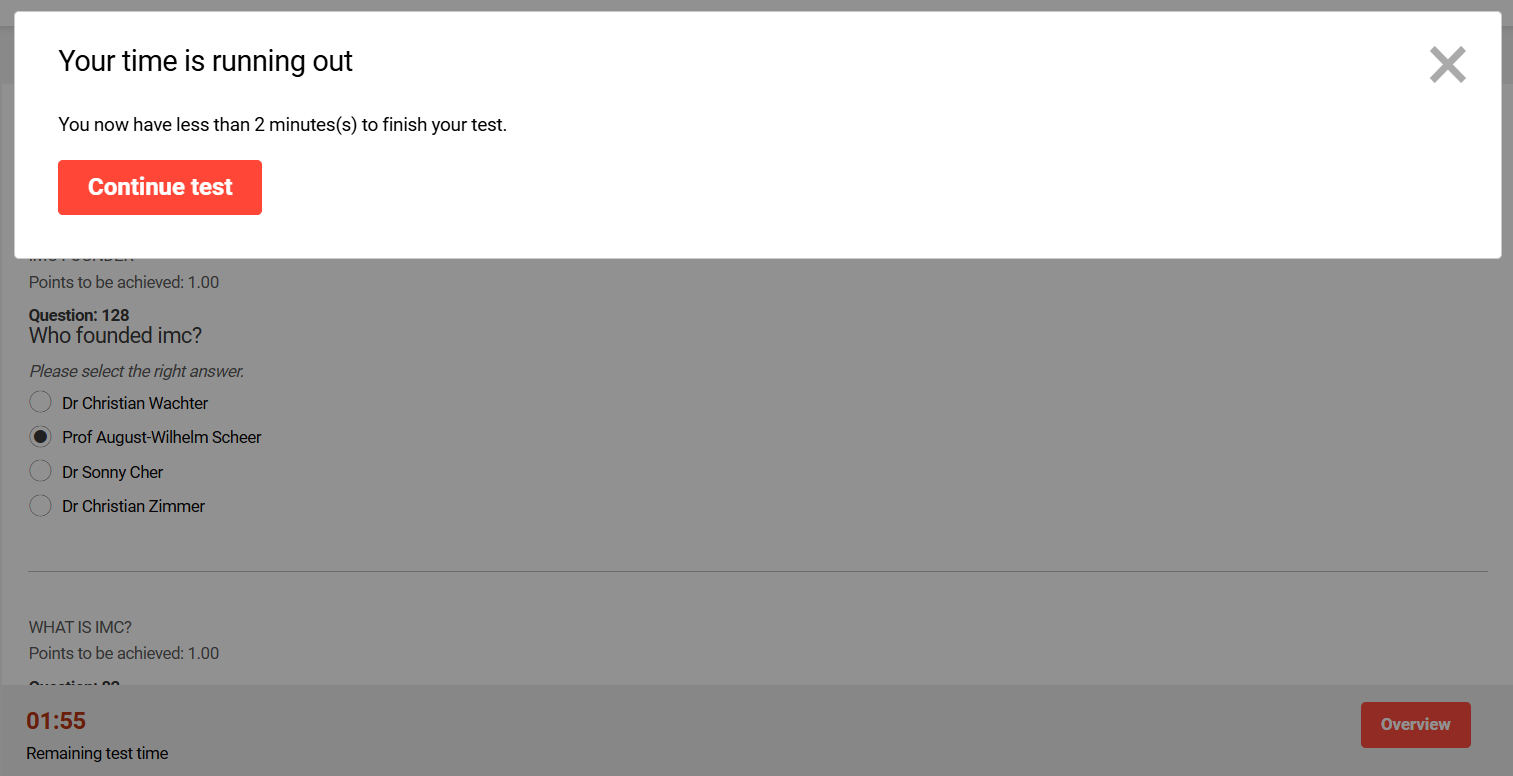
Show tip when remaining processing time is
When ticked, this setting enables a warning to be provided to participants that there is only X minutes remaining to complete the test. The warning is also displayed if the test is paused and then resumed. Populating this setting requires that the Processing-time limit setting is active and populated.
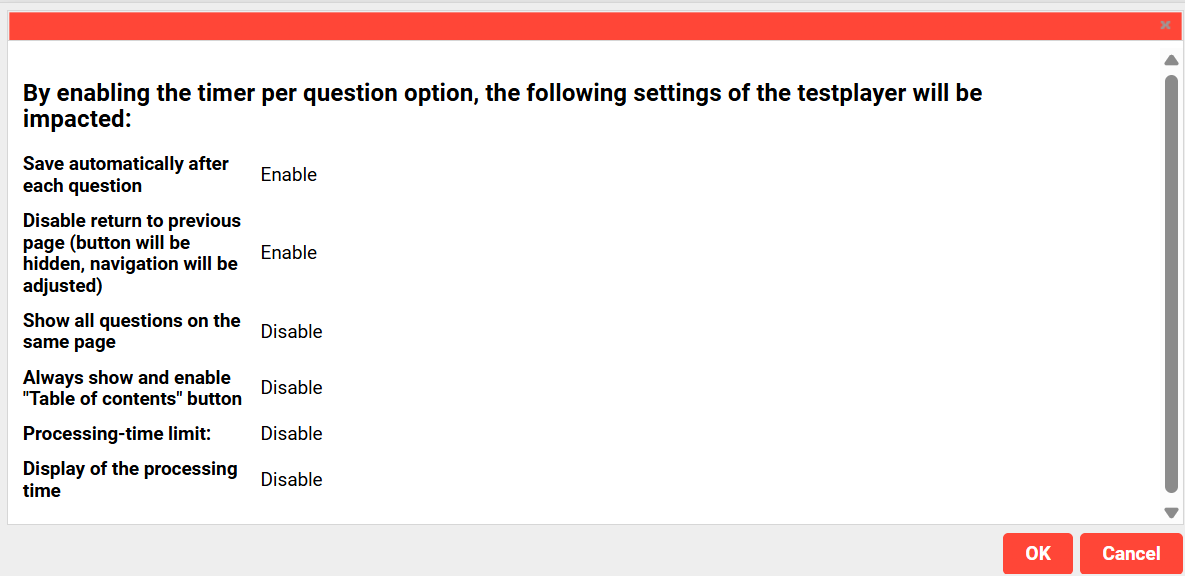
Enable timer per question based on the question processing time
When ticked, this setting enables the timer per question option. The value defined as processing time for each question will be displayed as a timer to limit the access to the given question. Enabling this option is dependent on many other settings as per the image below:
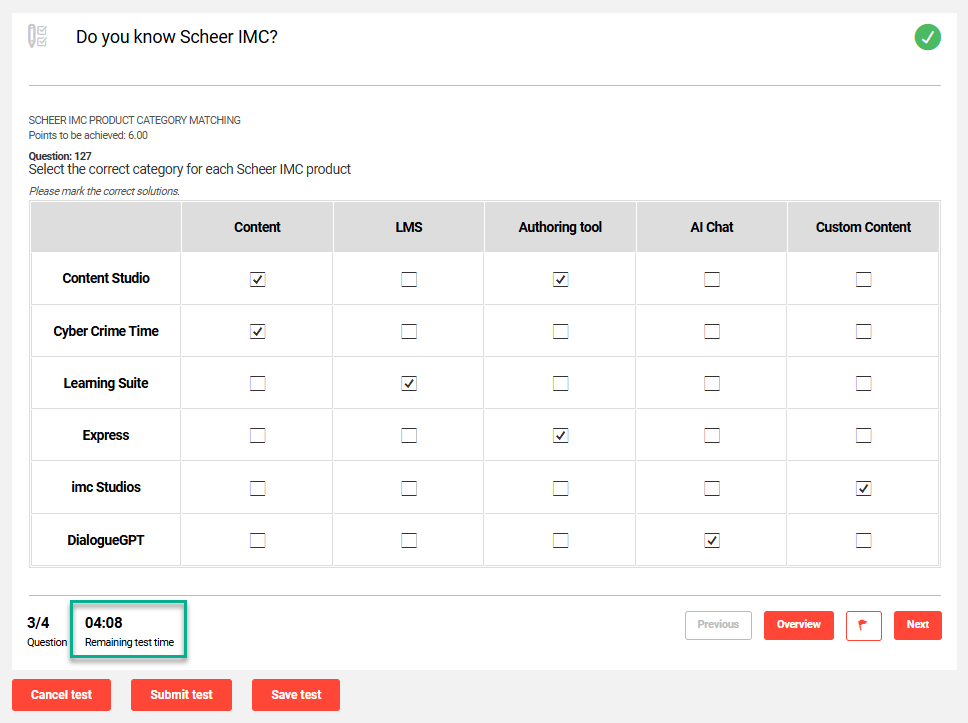
Display of the processing time
When ticked, the remaining processing time for the test will always be displayed to the participant. This will be a small time in the bottom left corner of the test player. Sets a time limit of X minutes for completing the test.
Saving Section
This section contains two settings relating to saving processes.
Save automatically after each question
When ticked, this setting saves progress each time a question is answered. However, if a processing time limit has been set, then progress is only saved when the test is submitted. If the test is cancelled, progress will be lost. This setting is not possible when the Show all questions on the same page setting is active.
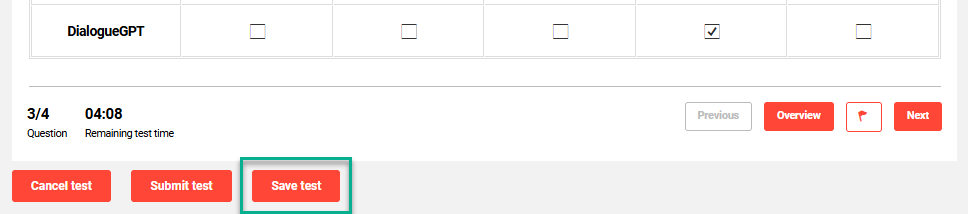
Show button to save manually
When ticked, this setting will only allow the test progress to be saved by clicking the Save test button. It is only possible to activate this method when the Save automatically after each question setting is inactive.
Certificate Section
This section contains settings related to test certificate types and access. A differentiation is made between certificates for passing and certificates when courses have not been passed. The test will be regarded as “Not passed” if the user achieves a number of points which corresponds to the lowest assessment level for the test. Individual certificates can be saved for each language used. If no certificate is available for the language which the user has completed the test in, the certificate defined as standard will be issued.
Certificate: pass
Enables selecting a certificate to be awarded when participants pass the test. The certificate available for selection are configured in the Certificates and notification templates function.
Certificate: attendance/fail
Enables selecting a certificate to be awarded when participants attempts or fails the test. The certificate available for selection are configured in the Certificates and notification templates function.
Access to certificate
This setting defines whether participants will immediately receive the certificate once final corrections are complete. Where a test has free text questions, the final correction requires an assessor to grade the questions.
Icons
There are two icons in the Test player.
Selected test player
When creating a new Test player, this setting can be used to select an existing template similar to requirements to transfer the settings. This can save time instead of manually configuring each setting.
Reset test player
Clicking this will restore the settings to the default values.